Contents - introduction - Prerequisites - Advanced ImageMagick processing - Install Fred’s ImageMagick scripts - Remove haze - Quick fixes for haze removal - Auto-level - Contrast stretch - Fred´s alternatives - My solution - Photos with crisp and deep shadows - Resources
introduction
In previous post I described how to install ImageMagick and cropping and resizing images, put text on images, and preparing frames for animations. In this post I will use ImageMagick for processing photos. More precisely how to improve landscape images by removing haze, and how to reduce the effects of sharp shadows in photos taken in bright daylight.
Prerequisites
You must have ImageMagick installed, and then you must have some photos to work with.
Advanced ImageMagick processing
Fred Weinhaus maintains a suite of ImageMagick based scripts that allows image processing at the level of commercial software. To access the scripts, got to Fred´s ImageMagick Scripts, and browse the type of processing you are looking for. In this post you will try a few of the scripts:
- autocolor
- autogamma
- autolevel
- autotone
- bcimage
- colorboost
- retinex
- space
- space2
- shadowhighlight
All available scripts are listed on top of Fred´s ImageMagick Scripts. Click the script you are interested in, read the license agreement, and download the script if you agree to the terms.
Install Fred’s ImageMagick scripts
To make the script available for use on your local machine you need to convert the downloaded script to an executable file, and then put it in your file system so you can access it. How to do that is described on the Home page of Fred´s ImageMagick Scripts.
On my mac osx machine, this is how it is done:
- Create a folder where you store all the scripts,
- add the extension “.sh” to the all scripts you download,
- make the script executable by exectuing the terminal command sudo chmod u+x “script”,
- move the scripts to the folder you created.
You can now use the script by giving the full path, but that is a bit tedious. I instead added the path to the folder with Fred´s scripts to my system profile .bash_profile. Open a new Terminal window, and make sure you are in your home directory by executing the print working directory (pwd) command:
$ pwd
You should then get a tilde(~) followed by your username in return.
Computername:~ youruser$
If you are not in your home directory, execute the following command at the Terminal prompt:
$ cd ~
You can add the path directly by writing at the command line, or by editing the file .bash_profile.
I prefer editing the file, as I can then comment what I have done. As you are about the edit a system file, you have to use the command sudo (superuser do or substitute user do) together with a text editor. I use the very basic Terminal text editor pico, and the command for opening .bash_profile in edit mode thus becomes:
$ sudo pico .bash_profile
Now you need to add the path to the folder where you put Fred´s IamgeMagick scripts, below any other PATHS already given.
PATH=/path/to/folder/imscripts:$PATH
The ‘:$PATH’ at the end adds existing PATHS, and if you do not add it the PATHS above will be lost to the system. I also comment (by starting the line with #) what I have done, and when I did it. Close and save the edits by holding down ctrl-X at the same time, and then click Y when asked to save changes.
Alternative you can write the PATH command directly at the prompt:
id=”terminal”>$ echo ‘export PATH=/path/to/folder/imscripts:$PATH’</span>
To take effect, you must close the Terminal window and reopen a new Terminal window.
Remove haze
Blue light has a shorter (more energy rich) wavelength compared to green, yellow and red. Blue light is more scattered in the atmosphere, and that is why the sky and water appears blue. That also means that shadows are dominated by blue light, and that objects far away appear blueish. The haze in landscape images is to a large extent thus blue in color.
Quick fixes for haze removal
There are a few quick fixes for removing haze, all relying on managing the histogram (distribution of color values) in the image.
Auto-level
Or, as Imagemagick calls is Automagically adjust color levels of image. The ImageMagick function -auto-level is a stable (idealized) solution for correcting images. It is a good starting point for trying any image improvement. But for removing haze it is usually not enough.
$ convert SrcImage.ext -auto-level DstImage.ext
Contrast stretch
A contrast stretch redistributes the intensity (the purity of any hue) values, and the image will appear more clear (but not necessarily more pleasing). ImageMagick has a built in function for -contrast-stretch, that is easy enough to use:
$ convert SrcImage.ext -contrast-stretch black-point(xwhite-point)(%) DstImage.ext
where black-point is the dark edge and must be give, white-point is optional and can be given as absolute value or percentage.
That might be a bit too simple, and usually it is best to also do some automatic image adjustment as a post process, like -auto-gamma or -auto-level.
$ convert SrcImage.ext -contrast-stretch 1x1% -auto-gamma DstImage.ext
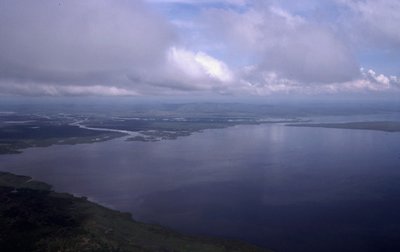
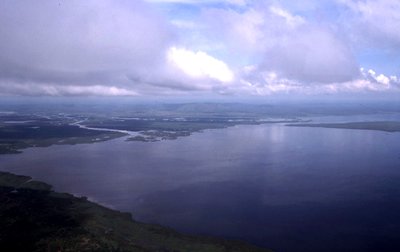
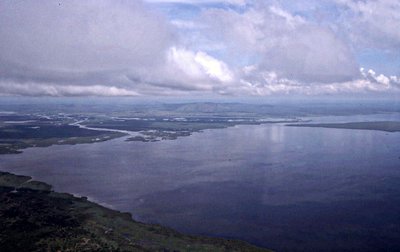
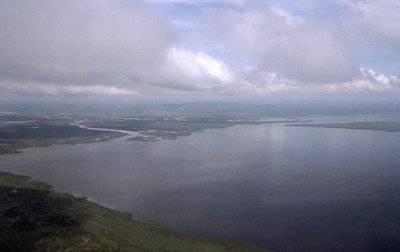
The figure below shows an original image (aerial photo over Lake Kyoga in Uganda), and the three quick fixes described above.
Fred´s alternatives
The alternatives for fixing haze using Fred´s ImageMagick scripts include:
- autotone
- retinex
- space
- space2
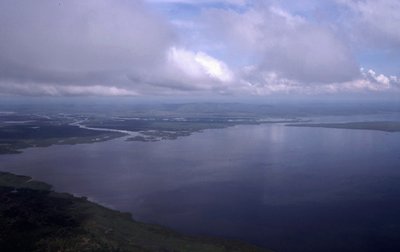
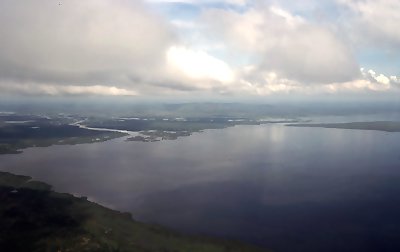
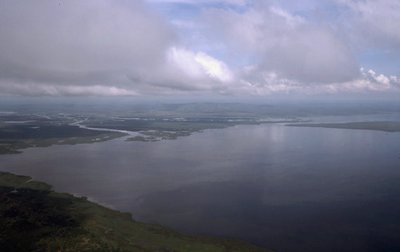
Fred’s pages very clearly go through the parameters that can be used with each alternative, with illustrations showing the results when applied to different kinds of photos, including aerial photos with lots of haze. The result when applying the default setting for each of Fred´s suggesed scripts for haze removal are shown in the figure below.
My solution
I am not happy with any of the solutions above, also because the results are not stable across photos from different landscapes and taken in different light conditions. Years ago I developed a more generic solution in PhotoShop, that has worked well for thousands on images that I have taken from small aeroplanes.
I have two versions, one for images taken in strong sunlight that requires a levelling of sharp shadows, and one that does not. In either case, a final step for automatically adjusting levels or colors can be added. Color adjustement is only availabe using Fred’s scrpts, either autocolor or boostcolor. The levels can be adjusted using either Fred’s scripts (autolevels) or ImageMagick (-auto-levels). The alternatives provided by Fred Weinhaus can be set using a variety of parameters as explained on Fred´s ImageMagick Scripts site.
Process for general correction of landscape images with haze:
convert SrcImage.ext \( -channel 2 -level 0%,100%,0.98 \) \
\( -channel 0 -level 0%,100%,0.99 \) \
-channel RGB -auto-gamma temp1.png;
composite -dissolve 50 SrcImage.ext temp1.png DstImage.ext;
[colorboost.sh DstImage.ext DstImage-colorboosted.ext]
[autocolor.sh DstImage.ext DstImage-autocolored.ext]
[autolevel.sh DstImage.ext DstImage-autocleveled.ext]
In the first step (convert) the blue channel (-channel 2) is levelled to 0.98 over the entire range of blue values. This equals lowering the gamma value and reducing the blue component. Then I do the same thing with red channel (-channel 1) but levelled to 0.99. The effect is that the green channel is highlighted. I then take all channels (-channel RGB) and apply -auto-gamma, and save the result as an intermediate image that I can inspect (but seldom do).
In most (almost all) cases the applied conversion is too strong, and the image loose its original vibrance. I thus compose the original photo and the manipulated version by -dissolve. In the example above I combine with equal weights (-dissolve 50), and the result is the average of the original and manipulated images.
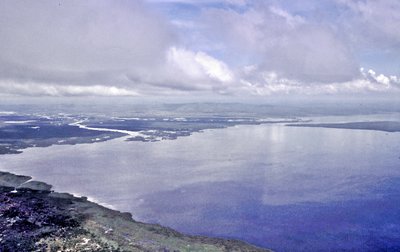
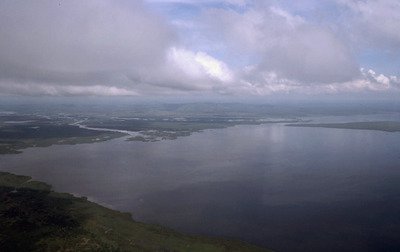
The only adjustment I normally do is changing the -dissolve mixing factor, which has to be done using a trial-and-error approach. The figure below shows the effect of the process chain above, including the three optional post-processing alternatives.
If the shadows are strong, I add the shadowhighlight script from Fred’s ImageMagick scripts as the first step. This compresses the range of all channels and hence works a bit like the -contrast-stretch above, but restricted to the darkest and brightest pixels. The -auto-gamma function in the second step restores the range of the channels, but shadows will have brightened up slightly.
shadowhighlight.sh -sa 50 -ha 10 SrcImage.ext temp0.png
convert temp0.png \( -channel 2 -level 0%,100%,0.98 \) \
\( -channel 0 -level 0%,100%,0.99 \) \
-channel RGB -auto-gamma temp1.png;
composite -dissolve 50 SrcImage.ext DstImage.ext;
[colorboost.sh DstImage.ext DstImage-colorboosted.ext]
[autocolor.sh DstImage.ext DstImage-autocolored.ext]
[autolevel.sh DstImage.ext DstImage-autocleveled.ext]
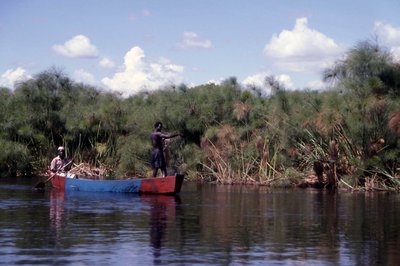
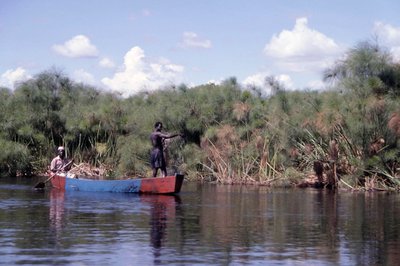
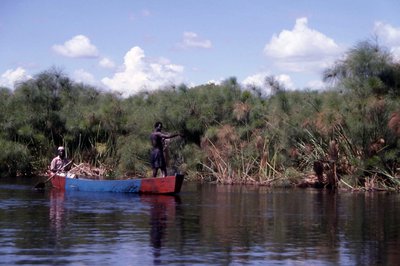
Photos with crisp and deep shadows
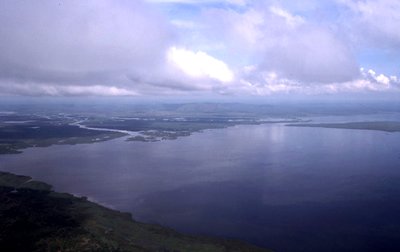
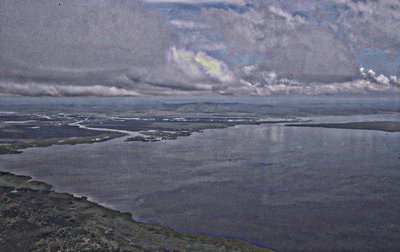
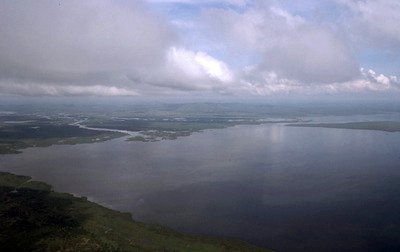
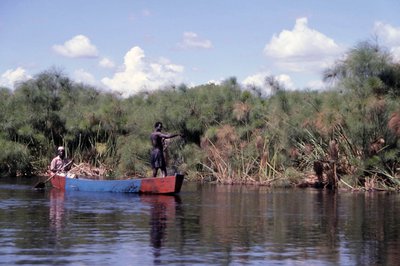
The best time of day to take landscape photos is at dawn or dusk, not at midday. But you do not always have control over that. The image in this example was taken at midday on Lake Kyoga, Uganda, a bit north of the equator.
The steps I use for reducing the shadows include shadowhighlight and autolevel adjustments, and then taking the average of the two adjustments.
shadowhighlight.sh -sa 50 -ha 10 SrcImage.ext temp0.png;
convert SrcImg.ext -channel RGB -auto-level temp1.png; \
composite -dissolve 50 temp1.png temp0.png temp2.png; \
autolevel.sh temp2.png DstImage.ext;
The figure below shows the original photo and the final result in the top row and two intermediate images on the bottom row. The final result is the average of the images at the bottom.
Resources
ImageMagick color modifications