Introduction
In this post I will use a time series of monthly satellite observations to create an animation of the soil water content over the Okavango swamps and the Makgadikgadi pans in northern Botswana. The satellite maps are produced by Karttur´s Geo Imagine Framework, and overlaid by a time line and an annual clock that shows the time in the animation. The images for the animation are prepared using ImageMagick and the movie is created using FFmpeg. How to install ImageMagick is covered in and earlier post, and how to put text and compose images is covered in another post.
Install FFmpeg
I am using FFmpeg, a Terminal command-line driven “cross-platform solution to record, convert and stream audio and video”. If you do not have FFmpeg installed, you can either download FFmpeg from the official homepage or use Homebrew, introduced in an earlier post.
$ brew install ffmpeg
The installations reports the following caveats when finishing:
==> Caveats
==> unbound
To have launchd start unbound now and restart at startup:
  sudo brew services start unbound
==> icu4c
icu4c is keg-only, which means it was not symlinked into /usr/local,
because macOS provides libicucore.dylib (but nothing else).

If you need to have icu4c first in your PATH run:
  echo 'export PATH="/usr/local/opt/icu4c/bin:$PATH"' >> ~/.bash_profile
  echo 'export PATH="/usr/local/opt/icu4c/sbin:$PATH"' >> ~/.bash_profile

For compilers to find icu4c you may need to set:
  export LDFLAGS="-L/usr/local/opt/icu4c/lib"
  export CPPFLAGS="-I/usr/local/opt/icu4c/include"

For pkg-config to find icu4c you may need to set:
  export PKG_CONFIG_PATH="/usr/local/opt/icu4c/lib/pkgconfig"

==> tesseract
This formula contains only the "eng", "osd", and "snum" language data files.
If you need all the other supported languages, `brew install tesseract-lang`.
Unless you have very special requests you can safely ignore the reported caveats.
FFmpeg can do vastly more than covered in this post, and there are many manuals and tutorials on how to install, configure and use FFmpeg out there. Here I will only use FFmpeg for creating an animation from a sequence of still images.
Image sequence
When creating an animation you need a sequence of images with the same dimensions (width and height). You can either prepare the images to have the dimensions of the final movie, or use FFmpeg to set the movie dimensions. I prefer to prepare the images with ImageMagick as that gives better control.
The maps that I (Karttur) produce are not primarily intended for movies. And even if Karttur’s Geo Imagine Framework can be set to produce maps of any dimensions over any part of the globe, I prefer to keep fewer regions in the Framework and use ImageMagick to prepare image maps for animations.
On Karttur’s map naming convention
All map files imported or produced from Karttur’s Geo Imagine Framework have a strict naming convention. Each image file name contains 5 main parts, where each part can also contain sub-parts. The main parts are separated by underscore (“_”) and include:
- content (indicating the thematic content)
- source (indicating the source of the content)
- location (indicating the geographical location)
- date (indicating the temporal validity of the content)
- suffix (any additional information, including version)
The general name form is thus:
content_source_locations_date_suffix.ext
Each part can be further divided using hyphen (“-”).
Data representing a specific country use the country 2-letter iso-code for representing location. Data with a date given as 4 integers represent annual data, 6 integers represent year+month, 7 integers year+day of year and 8 integers date represent the form YYYYMMDD. Dates including a hyphen represent a time span with the first item (before the hyphen) representing the initial date and the last item the last date.
ImageMagick image preparation
This section assumes that you have a sequence of images in a separate folder. And that the image files have a naming convention that allows the sequence to be recognized. The maps I am using in this post are over the Okavango swamps and the Makgadikgadi pans in Botswana (iso-code: bw). The thematic content is soil moisture estimated from Karttur’s “Transformed Wetness Index” (TWI) expressed as volume water over total volume and converted to percentage. The source of the data is MODIS satellite images (product MCD43A4, version 005). I use average monthly (MS) data for the animation in this post. The image file names thus become:
twi-percent_MCD43A4_bw_YYYYMM_v005-twi01-MS.tif
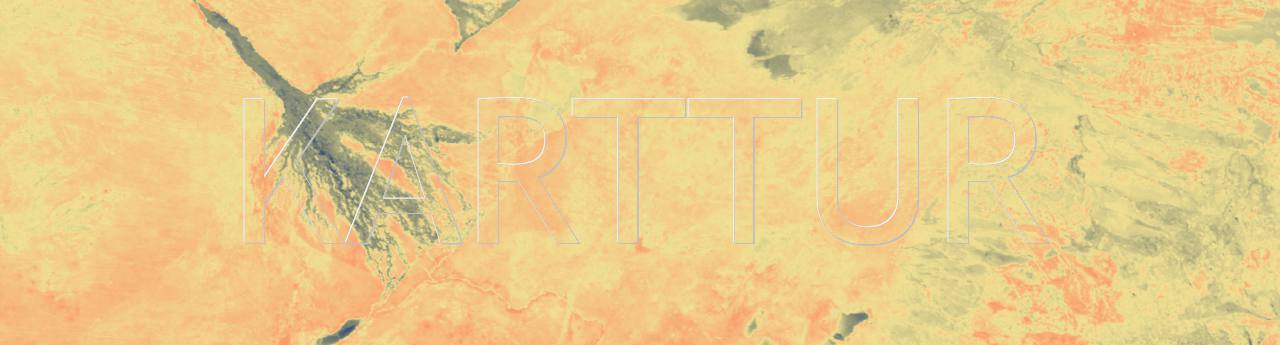
where YYYY and MM indicate the year and month represented in the image. The image below shows the average soil moisture (volume/volume) for Botswana 2001-2016, and is created using ImageMagick as explained in another post with an added embossed watermark as described in this post. The ImageMagick Terminal command for creating the image below from the original map is (with capital “C” replace by “(“):
$ convert \C -resize 716x -border 2x2 -bordercolor black SrcImage.tif \) \C -size 716x150 xc:none -font Trebuchet -pointsize 150 -gravity center -draw "fill silver text 1,1 'KARTTUR' fill whitesmoke text -1,-1 'KARTTUR' fill grey text 0,0 'KARTTUR' " -transparent grey -fuzz 90% ) -composite -quality 72 DstImage.jpg
The image width then becomes 720 pixels (716 + 2*border), which is the width of old analogue television sets (720x576). I will use that dimension for creating an animation in this post.
I do, however, want to create an animation only of the Okavango swamps and the Makdagikgadi pans in northern Botswana. I must thus first -resize and -crop my image sequence to fit the movie dimensions I chose.
Resize and crop images in time series
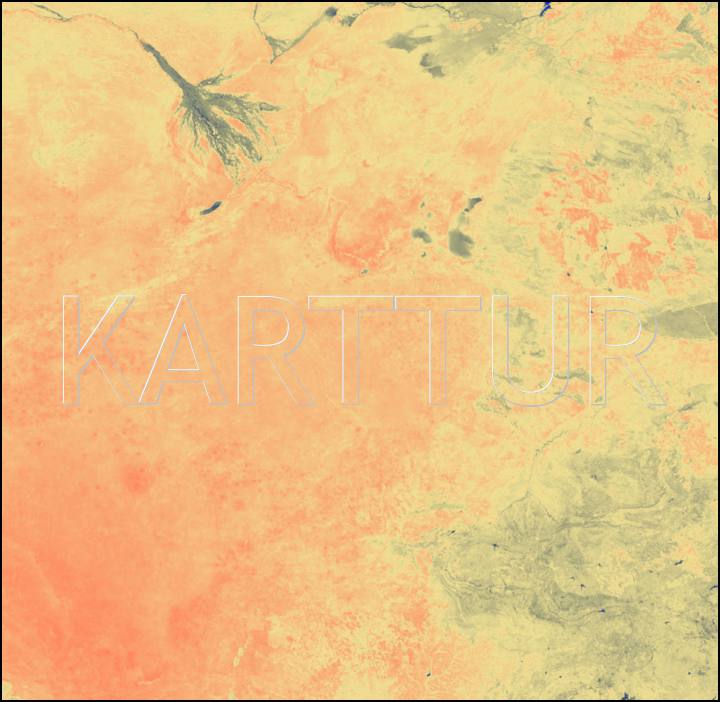
Once you have decided which region in your map (image) to use for creating a movie, use ImageMagick to -resize and -crop your images. Do not compress the images, but keep the png format throughout. The compression will be set in the move with FFmpeg. I also put the embossed watermark text on my films, so my ImageMagick command for getting the image sequence I want is (again you have to replace capital “C” with “(“):
$ for i in *.tif; do convert \C -resize 1450x -crop 720x576+250+55 "$i" \) \C -size 720x150 xc:none -font Trebuchet -pointsize 100 -gravity center -draw "fill silver text 1,1 'KARTTUR' fill whitesmoke text -1,-1 'KARTTUR' fill grey text 0,0 'KARTTUR' " -transparent grey -fuzz 90% \) -composite "pub-movies/${i%.*}.png"; done
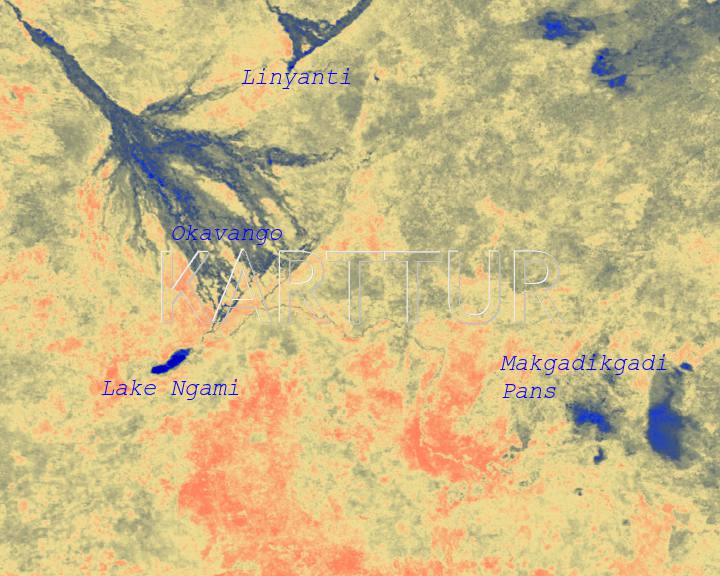
The image below shows one frame in the movie, prior to putting the clock on top. The text in the map is created using ImageMagick:
$ convert SrcImage.png -size 225x50 -background none -font CourierNewI -pointsize 24 -fill blue caption:"Okavango" -geometry +170+220 -composite caption:"Lake Ngami" -geometry +100+375 -composite caption:"Makgadikgadi Pans" -geometry +500+350 -composite caption:"Linyanti" -geometry +240+64 -composite -quality 72 DstImage.jpg
ImageClock
The ImageClock is created from a Python package that I wrote, and is part of Karttur’s Geo Imagine Framework. It is not publicly available. The trick is that it produces image clocks with files named exactly corresponding the image maps, but in a separate folder. Below is the ImageClock file for the image frame above (black is set to transparent in the overlay, but shown in the image below).

Overlay clock on map
You can put the clock above of below the map, but here I put it at the bottom, with the clock to the left. To overlay a single clock over a single map, the general ImageMagick command is:
$ convert SrcImage.png ClockImage.png -composite DstImage.png
Putting the clock in the lower left corner, add -gravity and set it to southwest
$ convert SrcImage.png ClockImage.png -gravity southwest -composite DstImage.png
To loop all images, use Terminal batch processing (introduced in this post). This is fairly easy because the map image and the overlay clock have the same name, but are in different folders.
$ for i in *.png; do convert "$i" "../imageclock/$i" -gravity southwest -composite "movieframes/$i"; done
You should now have a set of png images, each with a map representing a time step in a time series, with a clock and time line overlaid that shows the time of the map frame. It is time to create a movie, for which you will use FFmpeg.
Create FFmpeg movie
The basic FFmpeg command for creating a movie from a set of still images is:
$ ffmpeg -f image2 -pattern_type glob -i '*.png' DstMovie.avi
This renders an avi movie using the standard frame rate (frames per second, fps) of 25. That is a bit too fast for a map animation. And if you try the ffmpeg command above, you will also see that avi movie is of rather low quality. To create a more pleasing movie, you need to define fps and quality more carefully. Set the frame rate (fps) with the option -r:
$ ffmpeg -r 5 -f image2 -pattern_type glob -i '*.png' DstMovie.avi
Set codec and compression
As the created animation is intended for publication over the internet, you need to select a film format that can be read by web broswer. At time of writing this post, .mp4 and .webm are the most widely accepted formats. Both mp4 and webm are containers, and the actual coding inside can be set in a myriad of ways. I chose to use mp4 and the H.264 codec. The basic FFmpeg command then becomes:
$ ffmpeg -r 3 -f image2 -pattern_type glob -i '*.png' -vcodec libx264 -pix_fmt yuv420p -crf 20 DstMovie.mp4
where -vcodec libx264 is the H.264 video codec, -pix_fmt specifies the pixel color coding resampling (yuv420p is widely used for H.264 movies) -crf is the quality. To reduce the file size you can set a lower quality, by increasing -crf. The quality for an animated map can be set rather low, so I will go for -crf 35 to reduce the file size. You can also set a target bitrate (the data transfer per second) by using the -b option. For my movie I set the target bitrate to 1M (1000K), and the animation shown below is created with following ffmpeg command:
$ ffmpeg -r 3 -f image2 -pattern_type glob -i '*.png' -vcodec libx264 -b:v 1M -pix_fmt yuv420p -crf 35 DstMovie.mp4
You can increase the compatibility of the movie by adding the option -profile:v baseline. For me that almost doubled the file size. As this animation is intended for use by web browser, the published version does not have the -profile:v baseline.
$ ffmpeg -r 3 -f image2 -pattern_type glob -i '*.png' -vcodec libx264 -b:v 1M -pix_fmt yuv420p -profile:v baseline -crf 35 DstMovie.mp4