
These instructions are for creating a GithHub repository with a frame project linking together all python packages that constitute Karttur’s GeoImagine Framework. If you are looking for how to clone the ready version of the complete framework, continue to the post Git clone with Eclipse post.
Introduction
Joint or shared (coding) projects benefit largely from a repository service that keeps track of versions and changes. Git, initially developed by Linus Torvalds for creating Linux OS, is today the most widely used distributed version control system. This post covers setting up an Eclipse PyDev project using a GitHub repository (or repo for short). The PyDev project is just an empty container and will be used in the next post for linking PyDev packages, stored as individual repositories, as GitHub submodules.
If you are completely new to Git there are a plethora of introductions available. A pedagogic youtube introduction is Github Tutorial For Beginners, and if you prefer reading then Learn Git with Bitbucket Cloud is an alternative.
This post covers the following steps:
- Open a GitHub account and sign in
- Create empty repository in GitHub
- Add a clone of a GitHub repo to Eclipse
- Create a PyDev Project in Eclipse and team it up with the added GitHub repo
The youtube video How To Add Eclipse Project To GitHub covers much the same as this post regarding setting up GitHub and teaming up a GitHub repository with an Eclipse project. Except that in this post you are going to setup a PyDev project whereas the video is for a Java project.
Prerequisites
To follow the instructions in this post you need a GitHub account. If you need a hands-on introduction to GitHub, including setting up an account and creating a repository, the official GitHub Guide Hello World is a good place to start.
If you want to work towards a functional setup of the GeoImagine Framework you should aim for using Karttur´s python packages uplodaded as separate repositories as submodules. This is easily done by simply using the public python GeoImagine packages available on Karttur’s GitHub pages, but that is not due until the next post. To create a fully functional GeoImagine Framework you must also have installed the Spatial Data Integrated Development Environment (SPIDE) as outlined in my blog Install and setup spatial data IDE.
Open GitHub account and sign in
If you do not have a GitHub account, you have to sign up at github.com and create an account. Note the user name and password as you need them later in order to setup both GitHub Desktop and the command line tool for GitHub on your local machine. Once you have an account on GitHub, sign in.
At this stage you can download and setup GitHub Desktop. Even if I usually prefer to use Terminal commands, I find GitHub Desktop very useful for handling GitHub repositories. The rest of these instructions will assume that you have it installed.
Create and empty repository in GitHub
To store your project in Eclipse you need an empty repository to start with. Later you are going to use this repository as a container for linking together all the PyDev packages that, combined, constitute your project (for instance Karttur’s GeoImagine Framework). For now it will just be an empty repository. In this tutorial I named the example repository kt-gi-test01.
Create a GitHub repository as described in the GitHub page Create a repo. You can add a ReadMe file if you want to, or leave the repository completely empty. Aleterantively you can also create your repository from GitHub Desktop, and then commit and push it to your online GitHub account.
Add GitHub repo to Eclipse
To add the GitHub repo as a project in GitHub requires many steps. I found the youtube video How To Add Eclipse Project To GitHub instructive.
Clone GitHub repository with Eclipse
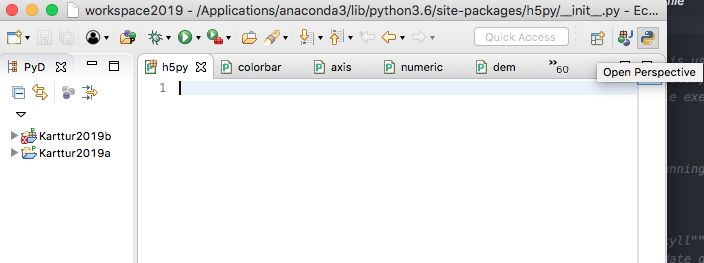
Start Eclipse. Once in, click the Open Perspective icon and select Git, or start writing “Git” in Quick access textbox.
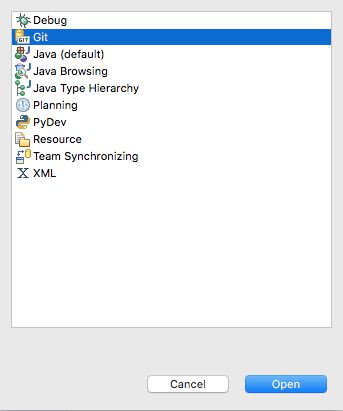
If you get different options for which perspective to select, click the alternative for Git and then it.
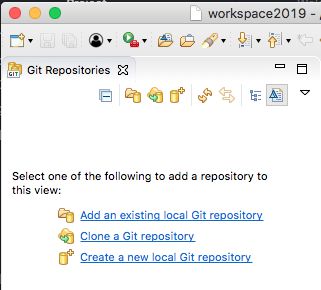
The view Git repositories should open (if not use the Quick access textbox and type Git, then select ). In the Git repositories view you should click the alternative Clone a Git repository (if no text appears slide the cursor over the icons to get the correct alternative).
In the dialogue window for Source Git Repository, fill in the URI to the repository (you can copy the path from your GitHub.com account). At this stage you do not need to fill in any other information. If you want to store your GitHub user and password you can fill them in, but only if you also accept to Store in Secure Store.
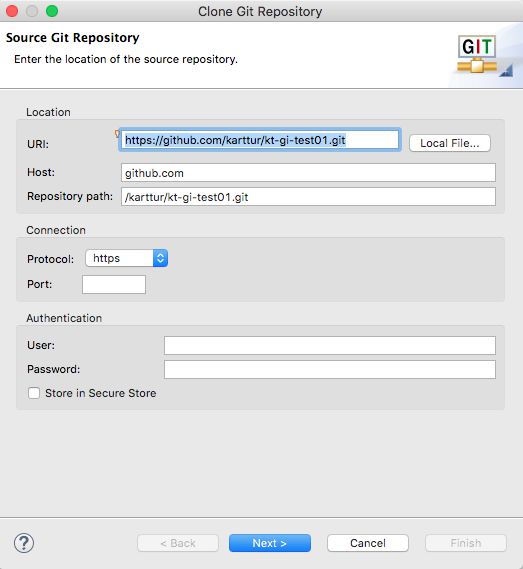
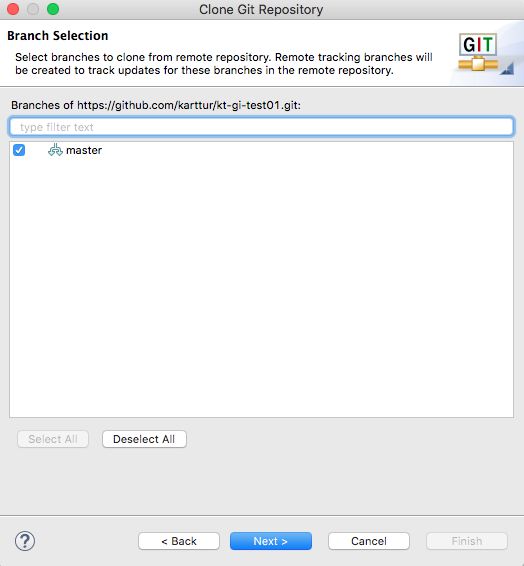
Click the button. This will take you to the Branch Selection view, that should only contain a single branch, master. Make sure master is selected and again click .
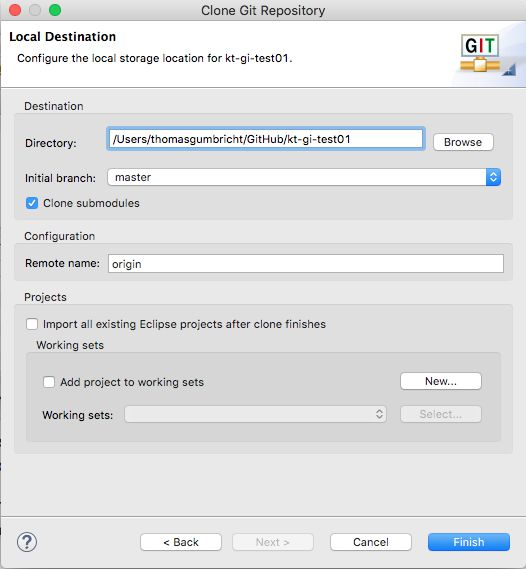
The next view is for Local Destination. Either accept the default or navigate to and select your preferred destination path. To give the destination folder the same name as the online repository (kt-gi-test01 in the example) is recommended. Click to continue.
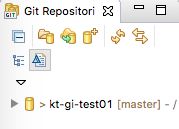
When ready, click and the GitHub remote repository should be cloned to your local machine. If it worked properly you should see the cloned repository in the Git Repositories view.
Create a new Eclipse project
You should now have a local clone of the remote GitHub repository with the local clone also added to Eclipse. The next step is to create a PyDev project in Eclipse and team it to the cloned GitHub repository.
To create a new project in Eclipse, either use the main menu:
,
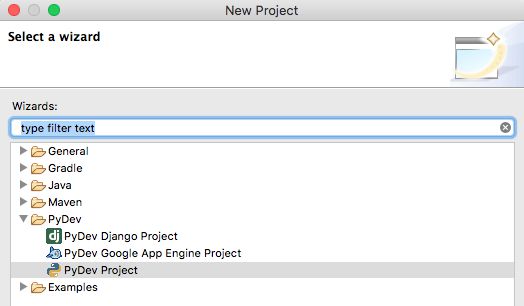
or right click in Package Explorer (navigation) window, and select the same sequence but starting with New. In either case you will end up with the Select a wizard window where PyDev project should be an alternative. If you do not get the PyDev project alternative it is most likely because you did not install Eclipse with PyDev support as outlined in the post on Setup Eclipse for PyDev.

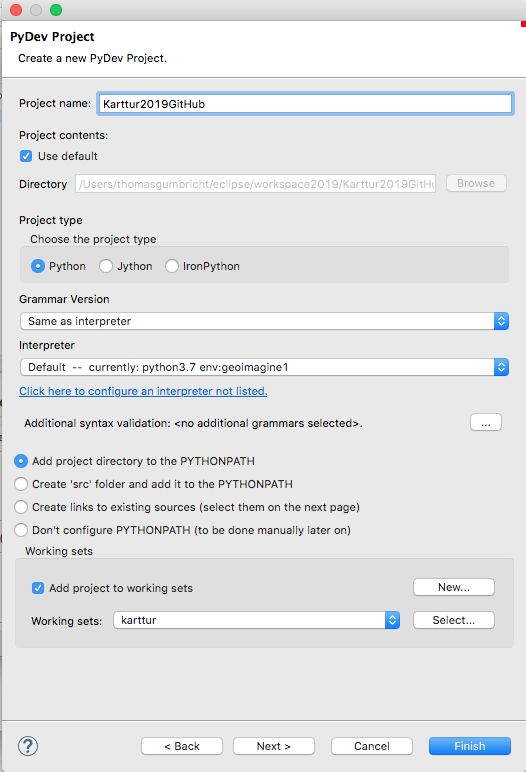
In the PyDev Project window you only have to fill in the Project name. The example for this turorial is named Karttur2019GitHub. You can leave all other entries with the default values, setting a Working set is optional. Click to create the PyDev project.
Link GitHub repository and Eclipse project
You should now have an added (cloned) GitHub repository as well as an empty PyDev project in Eclipse. It is time to link the the empty PyDev project to the cloned GitHub project (repository).
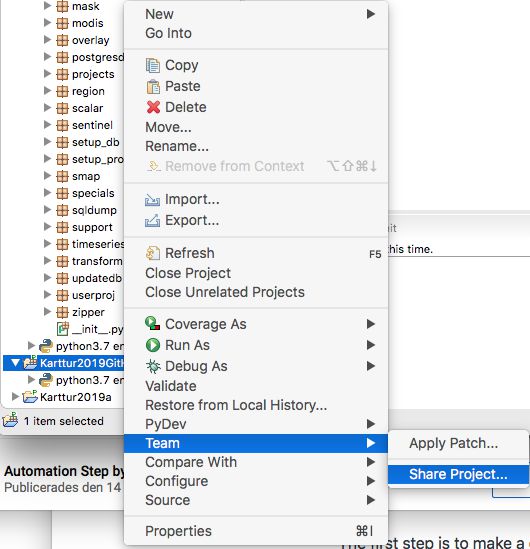
Select (click on) the newly created PyDev project in the Package Explorer (navigation) window in Eclipse, then right click and in the pop-out menus that sequentially appears select:
In the window Configure Git Repository that opens, you should see a Repository. If not, make sure the checkbox Use or create repository in parent folder of project is un-checked.
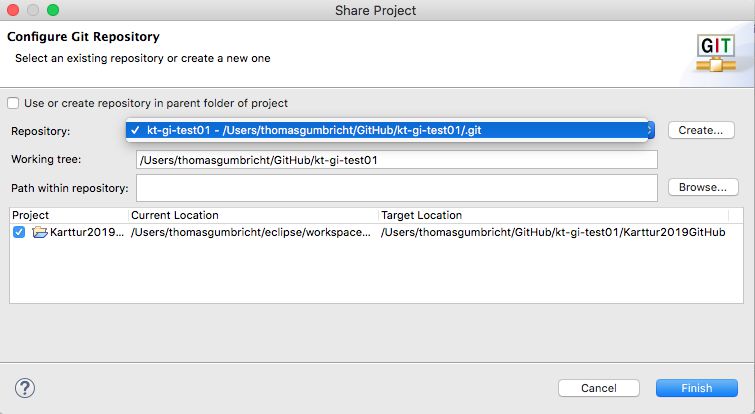
In the textbox Repository select the repository that you just cloned. Also make sure that the target project is selected. click .
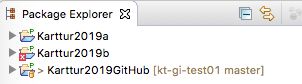
In the Eclipse Package Explorer (navigation) window, your PyDev project should now be indicated as linked (or piped “>”) to the [repository branch] (e.g. [kt-gi-test01 master]).
Create the hierarchical package structure
The PyDev project that you created above (e.g. Karttur2019GitHub) is stored under the local destination that you gave when cloning the GitHub repository. Either use the recommended text editor Atom (or another text editor that shows hidden files), or the Terminal to check the content. If using the Terminal first change directory (cd) to the project folder (i.e. the local clone) and then list all ls -a the content of the project directory:
$ cd path/to/GitHubClone/PyDevProj
For the example on my machine that becomes:
$ cd /Users/thomasgumbricht/GitHub/kt-gi-test01/Karttur2019GitHub,
where kt-gi-test01 is the local clone of the GitHub repository and Karttur2019GitHub the Eclipse PyDev project.
To list all (-a) files (even hidden), type:
$ ls -a
The returned list should contain two hidden files .project and .pydevproject. These two files define your Eclipse project.
Push the local changes to the online GitHub repository
The video by Raghav Pal on How To Add Eclipse Project To GitHub shows the steps below in more detail.
When you teamed up the PyDev project with the local clone of the GitHub repository, you also disentangled the content between the online (github.com) repository and the local clone. As your local clone is managed by Eclipse you can transfer the local changes to the online repository by first committing to the staged changes and then push them (in the Git jargon).
Again, right-click your PyDev project in the Package Explorer (navigation) window. The pop-out menu under Team has now changed, and reflects that this is piped (“>”) project under a cloned GitHub repository.
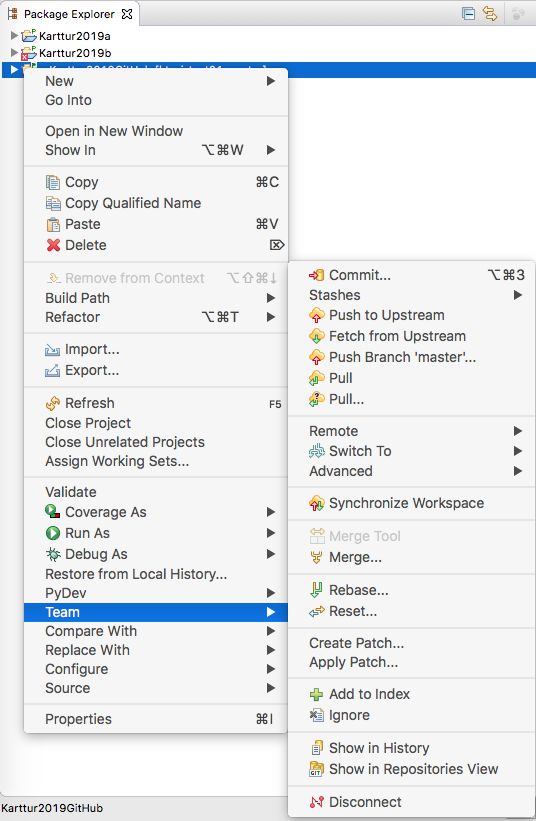
The top alternative in the pop-out sub-menu Team now says Commit. Click it and the bottom view of your project window should change to the Git staging view.
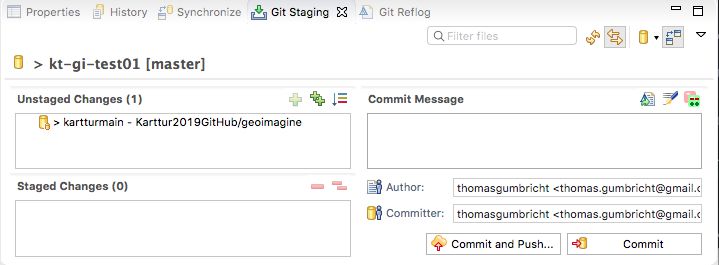
In the box with Unstaged Changes you should see the flies an folders you added. Drag them to the box below labelled Staged Changes and add a comment in the textbox Commit Message. The standard message at this point is “Initial commit”, but you can write a more informative message if you want. Then either click the button or followed by . In both cases you have to give your GitHub user and password, unless you set them above.
If you now return to your web-browser and your online repository, you should see that at the top level it contains a new folder Karttur2019GitHub and inside that folder should be the the two system files defining your PyDev project. If you do not see any changes in your online GitHub repository, refresh the view of the repository by reloading the page in your web-browser.
In the next post you will add python packages (to the PyDev project) as submodules (in the Git repository).