
Introduction
SSH keys
Creating a new GitHub repo
If I have understood correctly, you can only create an online GitHub repo using a browser and being logged in to your GitHub account. Explained in the GitHub page on Creating a new repository. However, you only need to create the repo, everything else can be done from your local command line as outlined on another of GitHub´s help pages Adding an existing project to GitHub using the command line.
Creating a new gh-pages blog repo
To be completed
Fork Karttur geoimagine
To contribute towards Karttur’s GeoImagine Framework you have to sign up with GitHub.com - see the post on Remote repositories with GitHub.
Fork indicidual packages
Indicvidual packages are named geoimagine-“package”.
Identify source repo
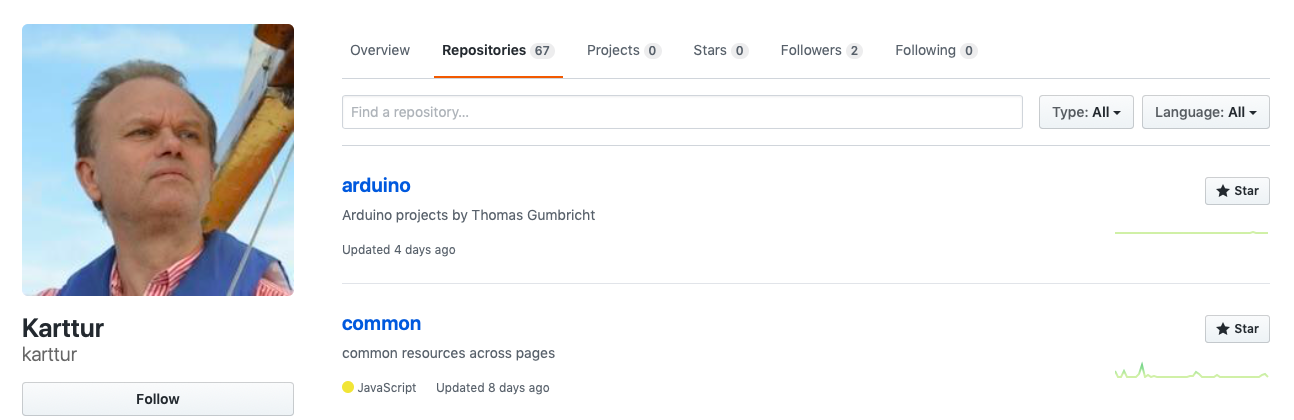
Go to Karttur’s GitHub account,
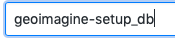 and identify (search in the Find a repository) the repo you want to fork. If for instance you want to work with the package on database setup (setup_db) you should look for the repo “geoimagine-setup_db”.
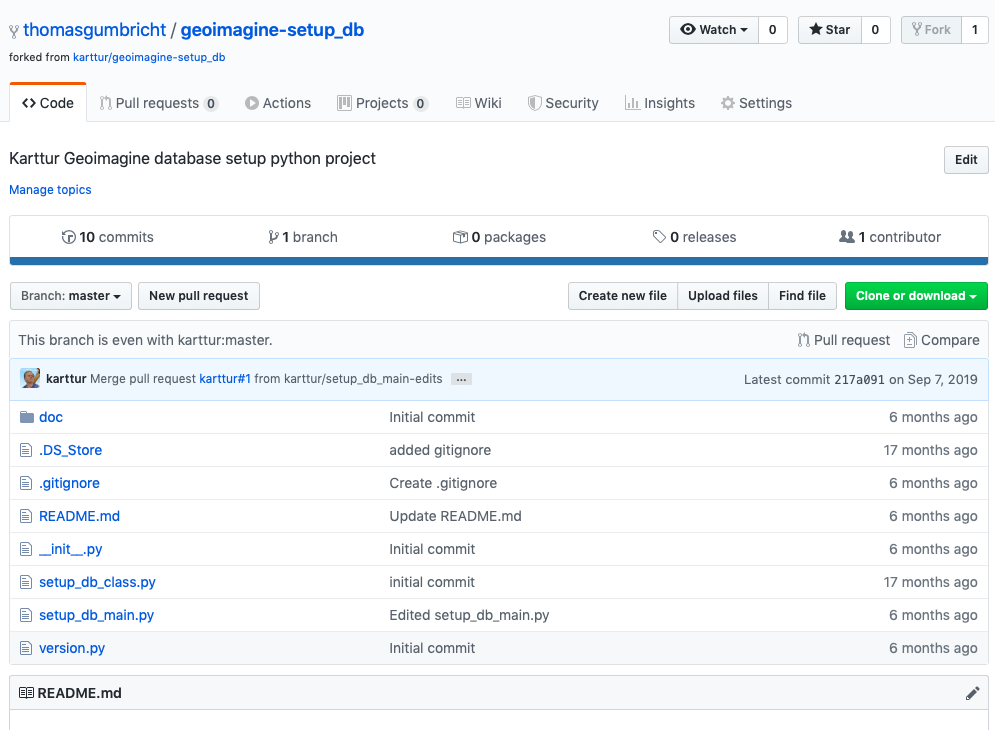
![]() Click on the fork symbol to retrieve (fork) the repo to your account.
Click on the fork symbol to retrieve (fork) the repo to your account.
Clone to local machine
To work with the package/repp you need to clone or download. The most difficult way to get the package to your local machine is to clone it with an SSH key (hidden credentials that allows you to seamlessly interact with from your local machine with your online GitHub account) or using GitHub Desktop. You can also download, but as you will have to push any changes to you GitHub account to particiapte in teh develoment, that is nto receommendd.
Clone using terminal
Open a terminal window and change directory (cd) to the parent folder where you want to have the clone of GeoImagine package. You need to consider the setup of your PyDev Integrated Development Environment (IDE). And locate the package/repo inside your IDE working directory setup for Karttur’s GeoImagine Framework.
$ cd /path/to/IDE/workingarea
While the onlne repo has the prefix “geoimagine” you shoudl remove that for the local clone. That is simply done using the standard clone command git clone [source-url] [target-name].
$ git clone git@github.com:thomasgumbricht/geoimagine-setup_db.git setup_db
Cloning into 'setup_db'...
remote: Enumerating objects: 10, done.
remote: Counting objects: 100% (10/10), done.
remote: Compressing objects: 100% (9/9), done.
remote: Total 124 (delta 2), reused 4 (delta 0), pack-reused 114
Receiving objects: 100% (124/124), 65.10 KiB | 653.00 KiB/s, done.
Resolving deltas: 100% (66/66), done.
cd to the cloned package/repo/directory and list (ls) the content:
$ cd setup_db
$ ls
README.md		doc			setup_db_main.py
__init__.py		setup_db_class.py	version.py
Create development branch
As a developer wanting to contribute, I suggest that you create a branch called dev and then use that for staging and committing edits to the codes and documents.
Working with branches is explored in detail in the post git branches in local repositories, expanded for use with GitHub in Remote repositories with GitHub and also how to use with forks in Forking repositories.
With the Terminal window still in your local repository (“setup_db”), type:
$ git branch
* master
There is only one branch in your repo - master.
Create a new branch and immediately switch to this branch: $ git checkout -b dev
Switched to a new branch 'dev'
Make some edits
to start the newly created development branch you need to make at least a minor edit to one of the included files. Changing a text string in README.md is sufficient.
$ pico README.md
# geoimagine-setup_db

%%%% Edits added by "githubuser" marked by "%%"  %%%%
Stage and commit changes
With edits done to the source files you can stage (add) and commit (lock in and save) the changes to your local git repository:
git add . git commit -m ‘edits to README.md’
If you did not create a new file, you can add (-a) the staging to the commit command, and insted of two commands just execute the one:
git commit -am ‘edits to README.md’
You can check out is anything is pending in the active branch (dev):
$ git status
On branch dev
nothing to commit, working tree clean
To get a graphical view of the commit log:
$ git log –all –decorate –oneline –graph
* a4efe67 (HEAD -> dev) edits to README.md
*   217a091 (origin/master, origin/HEAD, master) Merge pull request #1 from karttur/setup_db_main-edits
From the returned message you can see that the local HEAD pointer is ahead of origin/master, origin/HEAD, master, where origin is the default alias for the primary remote repository.
Push
Confirm the remote connections of the cloned repo you are working with:
$ git remote -v
origin	git@github.com:thomasgumbricht/geoimagine-setup_db.git (fetch)
origin	git@github.com:thomasgumbricht/geoimagine-setup_db.git (push)
To send your local changes to your GitHub online account, use the git push command:
$ git push -u origin dev
Enumerating objects: 5, done.
Counting objects: 100% (5/5), done.
Delta compression using up to 4 threads
Compressing objects: 100% (3/3), done.
Writing objects: 100% (3/3), 342 bytes | 342.00 KiB/s, done.
Total 3 (delta 2), reused 0 (delta 0)
remote: Resolving deltas: 100% (2/2), completed with 2 local objects.
remote:
remote: Create a pull request for 'dev' on GitHub by visiting:
remote:      https://github.com/thomasgumbricht/geoimagine-setup_db/pull/new/dev
remote:
To github.com:thomasgumbricht/geoimagine-setup_db.git
 * [new branch]      dev -> dev
Branch 'dev' set up to track remote branch 'dev' from 'origin'.
If you execute the extended log, you will see that the branch origin/dev has been added, and is up to date with the local dev branch.
$ git log –all –decorate –oneline –graph
* a4efe67 (HEAD -> dev, origin/dev) edits to README.md
*   217a091 (origin/master, origin/HEAD, master) Merge pull request #1 from karttur/setup_db_main-edits
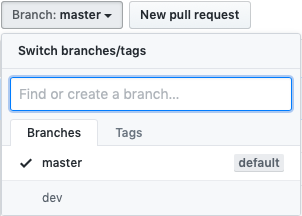
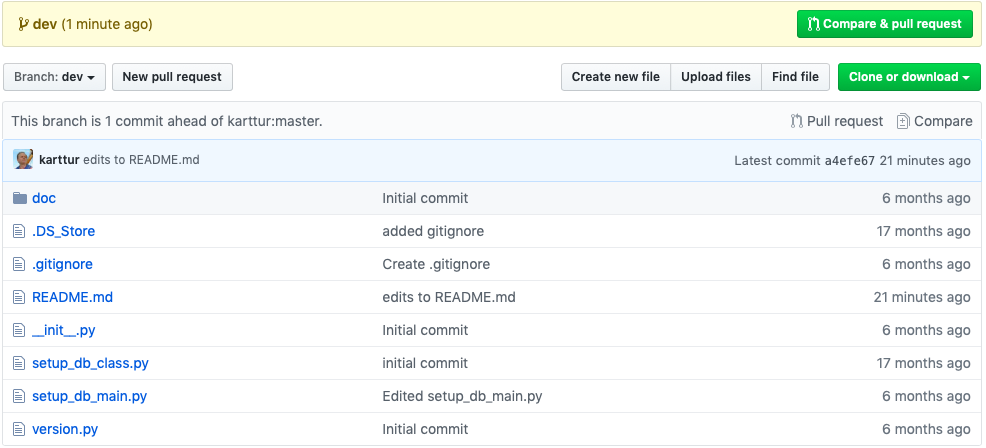
Return to your browser and your online GitHub account with the fork of “geoimagine-setup_db”. There should now be one additional branch. If you click on the button a dropdown menu shows all the branches (and some actions you can take).
Review and verify edits
You have made some edits and you want to either merge you edits into you own version of master or submit them to Karttur for updating of the original system (the repo residing with karttur itself). To review and verify edits use the git diff command. To find the differences between two branches:
$ git diff master..dev
diff --git a/README.md b/README.md
index 85d8158..85e7484 100644
--- a/README.md
+++ b/README.md
@@ -1,5 +1,7 @@
 # geoimagine-setup_db

+%%%% Edits added by "githubuser" marked by "%%"  %%%%
+
 Karttur Geoimagine database setup python project

 ## Introduction
As the local clone is in sync with origin, the result will be the same if you compare the remote branches:
$ git diff origin/master..origin/dev
If the edits are extensive you can compare difference on a file basis:
$ git diff master..dev --\ README.md
pull request
At this stage, with reviewed and verified edits that you feel Karttur’s GeoImagine Framework would benefit from incorporating, you should create a pull request.