
Introduction
In the online GitHub version control system (VCS) you can duplicate, or fork, any existing public repository to your own user. Further, you can clone the fork that resides in your GitHub user and work with it on your local machine while also keeping in sync with changes made in the original source. These are very powerful tools for developing your own projects using parts collected from all over GitHub.
This post covers how to fork an online, public GiHub project, create a local clone and keep both the local clone and the online fork in sync with each other and in sync with the original repo. The post is inspired by the Youtube Introduction to Git - Remotes by David Mahler. GitHub also have its own introduction to Forking Projects that also offers the the Spoon-Knife project for use when learning to fork.
Prerequisits
You have to have a GitHub account, preferably set up to allow access using a SSH, as outlined in the parallel post on Remote repositories with GitHub. You must also identify an online account with a public repo that you can fork - for instance the the Spoon-Knife project setup specifically for this purpose. If you want to try to make live updates from an original repo after it has changed, you need to create two online repos at GitHub that you can control.
GitHub fork
You can not push any local changes back to a GitHub repository that you have not rights to, even if it is public. But GitHub allows you to fork any public repo which is the same thing as creating an identical copy (or clone). The user performing the fork will then become the owner of the copy, allowing the new user to push changes. The forking is done from the source repo and it is cloned into the account of the logged in user.
Open your web-browser and log in to GitHub. You must be logged in order to fork Open a new browser window and navigate to the the Spoon-Knife project. Even if you are watching the Spoon-Knife project, you are still logged in as your own user.
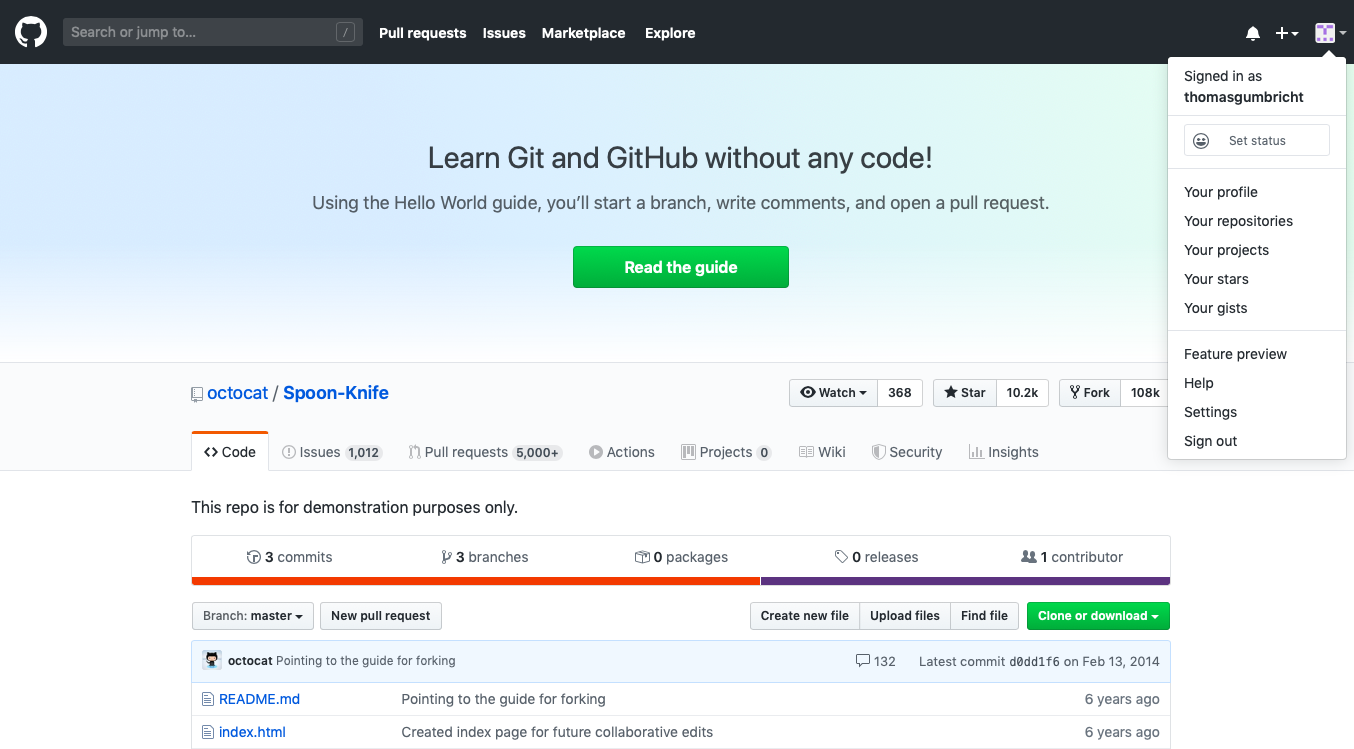
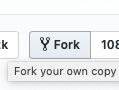
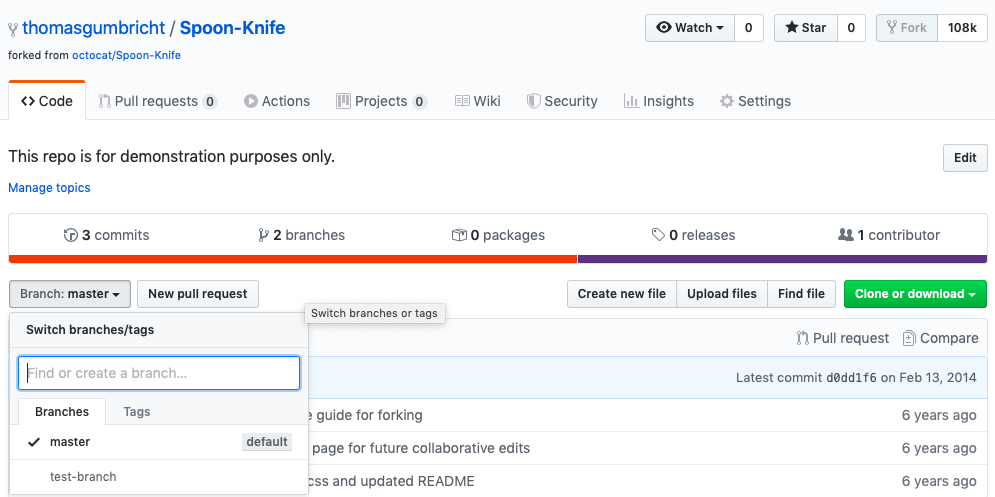
To fork a project to your own account, just click the button (shown to the left). The forking will take a few seconds, or more for large repos, and then your browser will show the copy of the forked repo in your own account. Note the small forked icon in front of the account name.
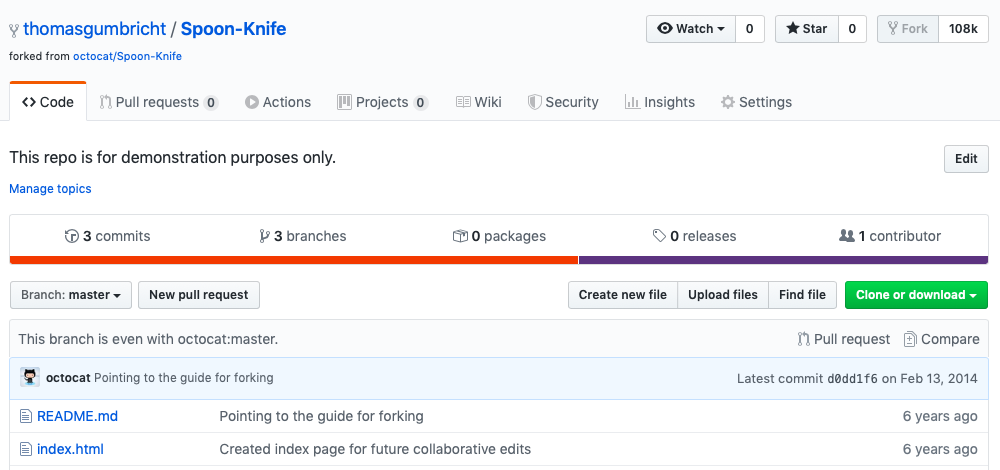
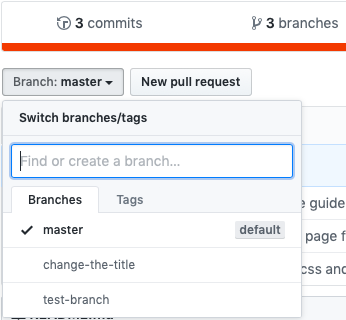
Note that the project (or repo) includes 3 branches. If you click on the button indicating the current branch , a dropdown menu appears and tells you the other branches, as well as gives you the option of creating further branches. We are going to return to these branches later in this post.
Clone forked account
You can now clone the forked repo to your local machine much in the same way as you cloned your own original repo in the parallel post on Remote repositories with GitHub.
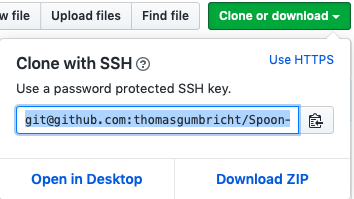
In your browser, viewing the Spoon-Knife repo, click on the button and copy the SSH based location string, as shown to the right.
Return to your Terminal window, cd to the parent folder where you want save the clone of the Spoon-Knife project, and git clone with the SSH link pasted:
$ git clone git@github.com:thomasgumbricht/Spoon-Knife.git
Cloning into 'Spoon-Knife'...
remote: Enumerating objects: 16, done.
remote: Total 16 (delta 0), reused 0 (delta 0), pack-reused 16
Receiving objects: 100% (16/16), done.
Resolving deltas: 100% (3/3), done.
git remote
cd into the cloned directory:
$ cd Spoon-Knife
Check out the remote connections of the repo:
$ git remote -v
origin	git@github.com:thomasgumbricht/Spoon-Knife.git (fetch)
origin	git@github.com:thomasgumbricht/Spoon-Knife.git (push)
Note that the default remote (named origin) link is with your (my) own account, not the account where the original project resided.
git remote add upstream
You now have a (static) copy of the forked project (Spoon-Knife) in your GitHub online account and clone of your own copy on your local machine. But you are detached from any updates done in the original repository (of Spoon-Knife). You can solve that, not via the online GitHub account, but using your local account. You accomplish that by adding another remote. When this remote is the parent of a fork residing as a clone in the repo itself (like in this case), the conventions is to call this remote “upstream”.
To create the required command you must first return to the parent repo of your fork, the Spoon-Knife project to grab the SSH path to call at the command line. Then execute the command:
$ git remote add upstream https://github.com/octocat/Spoon-Knife.git
To check out if this had any effect:
$ git remote -v
origin	git@github.com:thomasgumbricht/Spoon-Knife.git (fetch)
origin	git@github.com:thomasgumbricht/Spoon-Knife.git (push)
upstream	https://github.com/octocat/Spoon-Knife.git (fetch)
upstream	https://github.com/octocat/Spoon-Knife.git (push)
Aside from you primary remote repo (origin) your local repo is also linked to another repo under the alias upstream.
If you want to remove a remite the command for that is git remote remove [alias]</alias>
Sync with upstream
As shown in the parallel post on parallel post on [Remote repositories with GitHub](../blog-git-github you can check if you are in sync with a remote repo using git log or git status:
$ git status
On branch master
Your branch is up to date with 'origin/master'.

nothing to commit, working tree clean
$ git log –all –decorate –oneline –graph
* f439fc5 (origin/change-the-title) Update README.md
| * 5806070 (origin/test-branch) Create test.md
|/
* d0dd1f6 (HEAD -> master, origin/master, origin/HEAD) Pointing to the guide for forking
* bb4cc8d Create styles.css and updated README
* a30c19e Created index page for future collaborative edit
This message reveals that we have several branches in the remote (origin) repo:
- origin/master
- origin/test-branch
- origin/change-the-title
That our local master is in sync with with origin/master but behind the other branches. Neither the status not the log message reveal anything about the other remote repo, upstream. To access the status of upstream you first have to run the comamnd:
$ git fetch upstream
From https://github.com/octocat/Spoon-Knife
 * [new branch]      change-the-title -> upstream/change-the-title
 * [new branch]      master           -> upstream/master
 * [new branch]      test-branch      -> upstream/test-branch
If rerun git status the message will be the same as last time, but if you rerun log:
$ git log –all –decorate –oneline –graph
* f439fc5 (upstream/change-the-title, origin/change-the-title) Update README.md
| * 5806070 (upstream/test-branch, origin/test-branch) Create test.md
|/
* d0dd1f6 (HEAD -> master, upstream/master, origin/master, origin/HEAD) Pointing to the guide for forking
* bb4cc8d Create styles.css and updated README
* a30c19e Created index page for future collaborative edits
you see that all branches and commits form upstream and in sync with the corresponding branches/commits from origin. You have successfully connected and fetched documents from the original remote repo, that you gave the alias upstream.
git merge
Inspect the branches of your project (as for now all 3 versions are in sync upstream, origin and you local clone):
* f439fc5 (upstream/change-the-title, origin/change-the-title) Update README.md
| * 5806070 (upstream/test-branch, origin/test-branch) Create test.md
|/
* d0dd1f6 (HEAD -> master, upstream/master, origin/
Both the branches off master can be used for a fast-forward merge, but must then be followed by a 3-way merge - if you want to assemble all edits into master. This should be done locally. Start by merging the branch change-the-title into master:
$ git merge origin/change-the-title
Updating d0dd1f6..f439fc5
Fast-forward
 README.md | 2 +-
 1 file changed, 1 insertion(+), 1 deletion(-)
git push and git push delete
You can now delete the upstream branch change-the-title:
git push origin --delete change-the-title
To github.com:thomasgumbricht/Spoon-Knife.git
 - [deleted]         change-the-title
If you return to your browser and refresh the view over your online GitHub repo Spoon-Knife, you will see that now there are only 2 branches.
If you check status:
$ git status
On branch master
Your branch is ahead of 'origin/master' by 1 commit.
  (use "git push" to publish your local commits)

nothing to commit, working tree clean
git will notify you that you are one commit ahead locally compared to origin/master, and how to <span class=terminalapp>git push</span> to get in sync:
$ git push
Total 0 (delta 0), reused 0 (delta 0)
To github.com:thomasgumbricht/Spoon-Knife.git
   d0dd1f6..f439fc5  master -> master
git tracking
You might already have noted that the remote branches did not clone to your local machine. You have to “clone” these separately. The standard command checkout (see post on ) can be used with the parameter -b to create a local conte tracking a remote branch git checkout -b [branch] [remotename]/[branch]:
$ git checkout -b test-branch origin/test-branch
If your new branch shall have the same name as the remote branch, you can shorten this to:
$ git checkout –track origin/test-branch
A third alternative is to first create a local branch, and then attach it to tracking the remote branch:
$ git branch test-branch
git checkout test-branch
git branch –set-upstream-to origin/test-branch
Use one of the alternatives above to create a local branch that tracks the branch test-branch at origin, then run the extended git log command:
$ git log –all –decorate –oneline –graph
* f439fc5 (upstream/change-the-title, master) Update README.md
| * 5806070 (HEAD -> test-branch, upstream/test-branch, origin/test-branch) Create test.md
|/
* d0dd1f6 (upstream/master, origin/master, origin/HEAD) Pointing to the guide for forking
* bb4cc8d Create styles.css and updated README
* a30c19e Created index page for future collaborative edits
You can also check you local branches with the command:
$ git branch
master
* test-branch
The local branch test-branch is now included, and the active branch. Let us try to merge it with the local master:
$ git branch checkout master
$ git merge test-branch
Merge made by the 'recursive' strategy.
test.md | 1 +
1 file changed, 1 insertion(+)
create mode 100644 test.md
With another successful merge completed, you can delete the branch. But this time you have a local branch that is tracking a remote branch. To delete the tracking, use the command:
$ git branch -delete -remote origin/test-branch or $ git branch -dr origin/test-branch
Deleted remote-tracking branch origin/test-branch (was 5806070).
And then delete the local branch itself:
$ git branch -d test-branch
Deleted branch test-branch (was 5806070).
Now you can also delete the remote branch at origin:
$ git push origin –delete test-branch
To github.com:thomasgumbricht/Spoon-Knife.git
- [deleted] test-branch
Remember to push the changes form you local repo to the online origin:
$ git push
Enumerating objects: 4, done.
Counting objects: 100% (4/4), done.
Delta compression using up to 4 threads
Compressing objects: 100% (2/2), done.
Writing objects: 100% (2/2), 297 bytes | 297.00 KiB/s, done.
Total 2 (delta 1), reused 0 (delta 0)
remote: Resolving deltas: 100% (1/1), completed with 1 local object.
To github.com:thomasgumbricht/Spoon-Knife.git
f439fc5..6a4b7e8 master -> master
If you check
$ git status
On branch master
Your branch is up to date with 'origin/master'.

nothing to commit, working tree clean
and if you check your online GitHub repo (Spoon-Knife) there should only be only one branch: master.
git branch
The standard command git branch returns a list of the local branches, with a star * indicating the active branch. To instead inspect remote branches, add the parameter -r:
$ git branch -r
and to inspect both local and remote (all, -a)
$ git branch -a
Sync with upstream
As you have no rights to edit or change the upstrem project, you can not infer any changes. Neither can you react to any “downstream” suggestions for changes. To fully test the links between GitHub and git for these kinds of version control you need to get two separate GitHub accounts that you control. I will not cover that fully in this tutorial, just outline the principle steps.
Sync from upstream
First update for any commits that have occurred in upstream, otherwise they will not be recorded in your local history tree.
$ git fetch upstream
Inspect the relation between upstream and your local clone, for example with the extended log command:
$ git log –all –decorate –oneline –graph
If the local master is behind upstream/master run a merge from your local master:
$ git branch checkout master
$ git merge upstream/master
You local repo master branch is now in sync with upstream/master, but the GitHub fork is still behind, which you an confirm with another git log command:
$ git log –all –decorate –oneline –graph
To sync the online fork, push the merged local master to origin/master
$ git push origin master
Pull requests
A pull request is a GitHub specific command that notifies the fork origin account of proposed changes. Before sending a pull request, you need to do some edits or changes (otherwise you have nothing to suggest). The best way to go about that is to create a new branch that holds the edits or changes.
Create new branch
The process of proposing changes usually starts at you local clone of the forked repo. Thus, in your Terminal window pointing towards your local clone of the the Spoon-Knife project, create a new branch:
$ git checkout -b “edit-index”
Switched to a new branch 'edit-index'
Do some edit that you also save in the file index.html
commit the changes to the branch edit-index:
$ git commit -am “update index.html”
[edit-index 8b19037] update index.html
 1 file changed, 1 insertion(+)
Your local repo will now be ahead of, and out of sync with your forked GitHub repo (with the alias origin). Push the changes to origin:
$ git push origin edit-index
Enumerating objects: 5, done.
Counting objects: 100% (5/5), done.
Delta compression using up to 4 threads
Compressing objects: 100% (3/3), done.
Writing objects: 100% (3/3), 322 bytes | 322.00 KiB/s, done.
Total 3 (delta 2), reused 0 (delta 0)
remote: Resolving deltas: 100% (2/2), completed with 2 local objects.
remote:
remote: Create a pull request for 'edit-index' on GitHub by visiting:
remote:      https://github.com/thomasgumbricht/Spoon-Knife/pull/new/edit-index
remote:
To github.com:thomasgumbricht/Spoon-Knife.git
 * [new branch]      edit-index -> edit-index
Pull requests
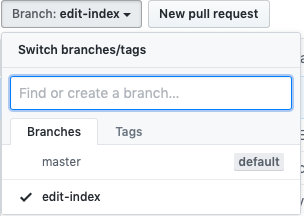
Return to your online GitHub account. it should now have 2 branches. Change to the branch edit-index via the button that says .
The latest registered commit is the “update index.html”. GitHub also tells you that the branch is 4 commits ahead of the source of the fork.
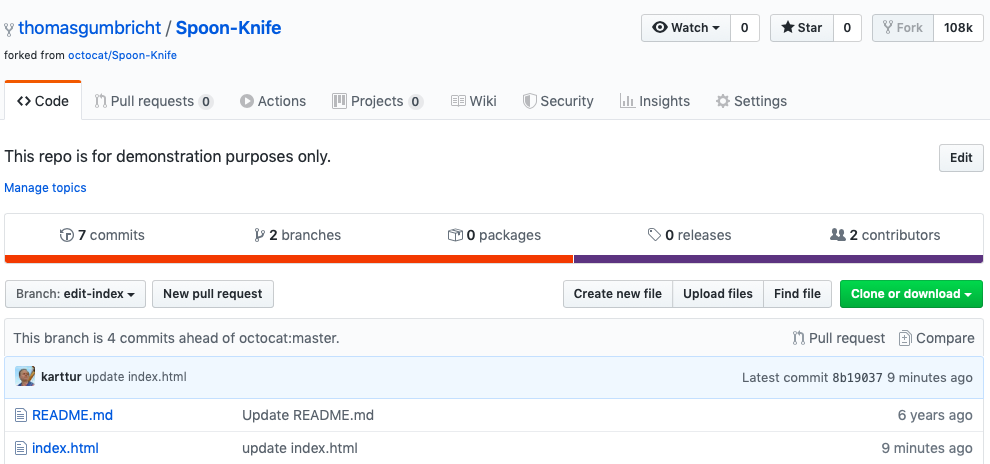

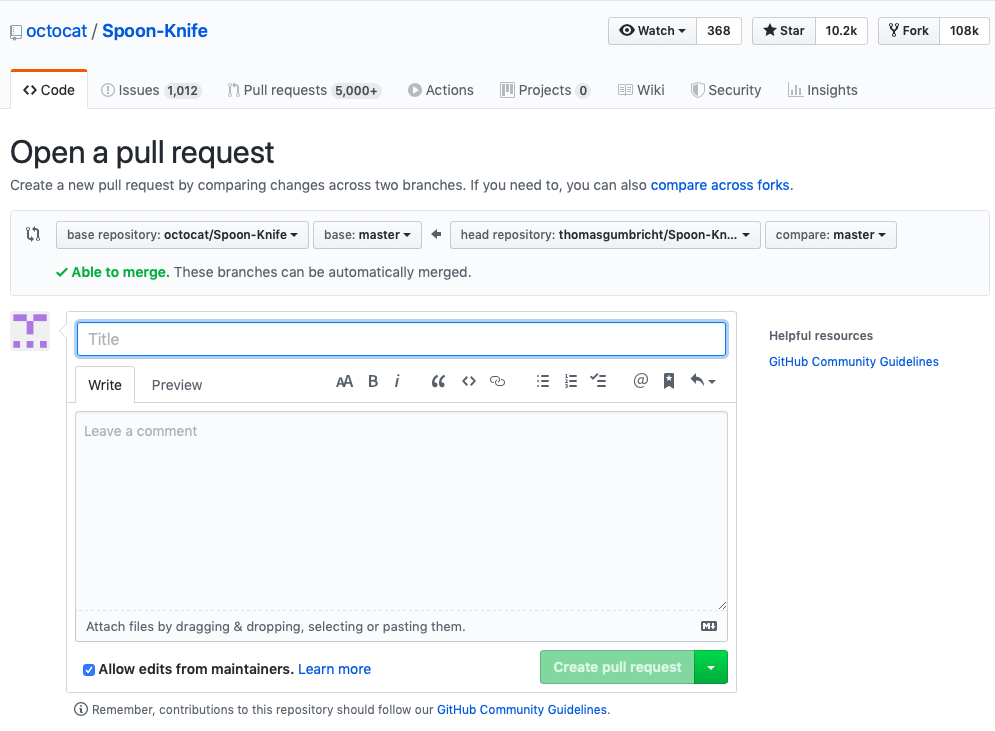
You can now create a “New pull request”, by clicking the button for that (illustrated to the right). That will take you to the GitHub repo that is the origin of the fork displaying a “Comparing pages” window. As the project you have tested out, the the Spoon-Knife project was created as a test-project it is full of older pull requests.

To actually generate a pull request for the owner of the account, click the button. To send the request you have to fill in the textboxes for title and Comment and then click Create pull request.
The maintainers of the repo can now decide what to do with your request (accept or reject). Dependent on what actions are taken you can then choose to delete the branch with your suggested edits, continue with your own development, or try to alter your edits to get them accepted (if rejected), etc.