
Introduction
A local clone or copy of a PyDev project can be imported to Eclipse either as a complete project, or by building a backbone PyDev project and copying and pasting selected parts. This post describes how to import a local clone of Karttur’s GeoImagine Framework as a complete project to Eclipse. If you instead want to build a customized Framework with only selected packages you should follow the instructions in the post Copy and paste Karttur’s GeoImagine Framework.
The alternative is to clone the Framework directly from the repo on Karttur’s GitHub pages as described in the post on Git clone with GitHub Desktop and terminal.
Prerequisites
To follow this post you must have cloned Karttur’s GeoImagine Framework to your local machine. Described in the post on Git clone with GitHub Desktop and terminal.
Project configuration
An Eclipse PyDev project is defined by two files:
- .project
- .pydevproject
These are hidden files that must exist directly under the root folder of the PyDev project. To actually see and access the files, you can either use Atom or the Terminal and pico. Here I only cover how to use the Terminal.
In an open Terminal window, change directory (cd) to the location of the cloned project:
$ cd /path/to/cloned/project/rootfolder
Then list all ls -a files in the that root folder:
$ ls -a
The ls -a command also lists hidden files, and you should see both .project and .pydevproject in the returned list.
You can open the hidden files and read them with pico:
$ pico .project
<?xml version="1.0" encoding="UTF-8"?>
<projectDescription>
        <name>KartturGeoImagine</name>
        <comment></comment>
        <projects>
        </projects>
        <buildSpec>
                <buildCommand>
                        <name>org.python.pydev.PyDevBuilder</name>
                        <arguments>
                        </arguments>
                </buildCommand>
        </buildSpec>
        <natures>
                <nature>org.python.pydev.pythonNature</nature>
        </natures>
</projectDescription>
$ pico .pydevproject
<?xml version="1.0" encoding="UTF-8" standalone="no"?>
<?eclipse-pydev version="1.0"?><pydev_project>
<pydev_pathproperty name="org.python.pydev.PROJECT_SOURCE_PATH">
<path>/${PROJECT_DIR_NAME}</path>
</pydev_pathproperty>
<pydev_property name="org.python.pydev.PYTHON_PROJECT_VERSION">python interpret$
<pydev_property name="org.python.pydev.PYTHON_PROJECT_INTERPRETER">Default</pyd$
</pydev_project>
Once you have confirmed that the two project files exists, and that the <name> tag in .project corresponds to the name of the root folder of the project, you can import Karttur’s GeoImagine Framework to Eclipse.
Import project
Start Eclipse. To import an existing project you need to bring up the import dialog. As usual with Eclipse there are several ways to bring up this dialog:
- , or
- right click in the Pydev Package Explorer Window
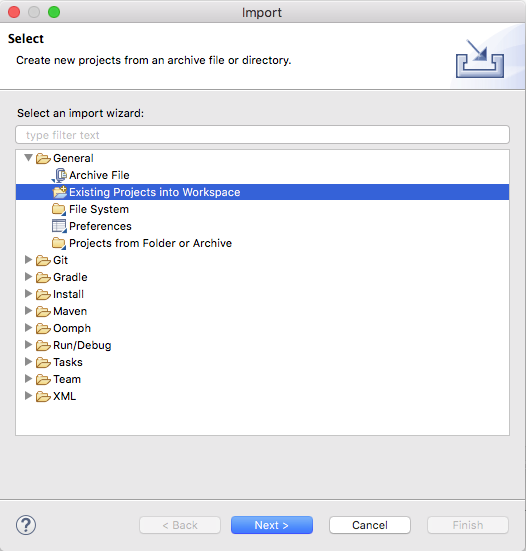
The Import dialog window opens. Select General –> Existing Projects into Workspace and then click .
A new dialog window Import Projects From File System or Archive opens. Navigate to the root directory for the project that you want to import (the one with the two hidden project files).
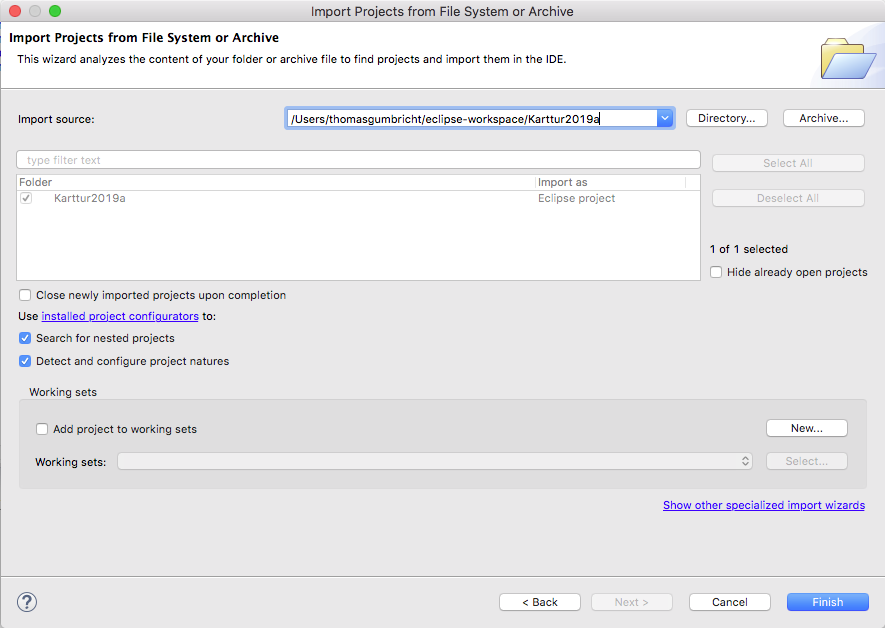
If this is a project root folder, a check box will appear with the project folder ticked. If not you have either located the wrong folder, or the root folder lacks the two hidden project files. Unless you already cloned the project into your Eclipse workspace (or want to keep it at some other locations) click the checkbox Copy project into workspace.
Click to import a complete version of Karttur´s GeoImagine Framework.