Introduction
It seems that stand alone Arduino project must eventually run from a 3.3 volt system solution. To be powered it needs a charge regulator and a battery. And to run 5v components it would also need a stepup device that boosts from 3.7v to 5v if you really can trust the device, otherwise between 7 and 12 volts.
The battery should be charged using a standard usb-solution. For me the battery capacity is less important, my device will not consume much. The battery should be a Lithium Polymer (LiPo).
Youtobe introduction
A good, but also outdated, introduction is the youtube video by LessonStudio on HOW TO: Use Lithium 3.7v batteries in small Arduino projects.. The video is outdated regarding the TP4056 module - the later versions can be used for power supply, as explained further down in this post. The part called 18650 in the video is now the new TP4056.
The video is also not explaining how to actually power your arduino project. If you have very well regulated 5volt supply you can directly put the power from the regulator to the 5V port on the arduino. But if yuour power supply (battery) is not regulated, but vary, you should instead put the power to the Vin port on the Arduino, and then (7)9-12 volts is required, as explained on stackexchange.
Battery control board
LiPo batteries require a control board, or manager. The most advanced module that I have found is the SparkFun Battery Babysitter. This device both controls the charging and the power (draining), can be connected to Arduino and show the battery status. At time of writing this (December 2019), this module is not available in Sweden. Having gotten deeper into this subjects it seems that the “babysitter” is an overkill anyway.
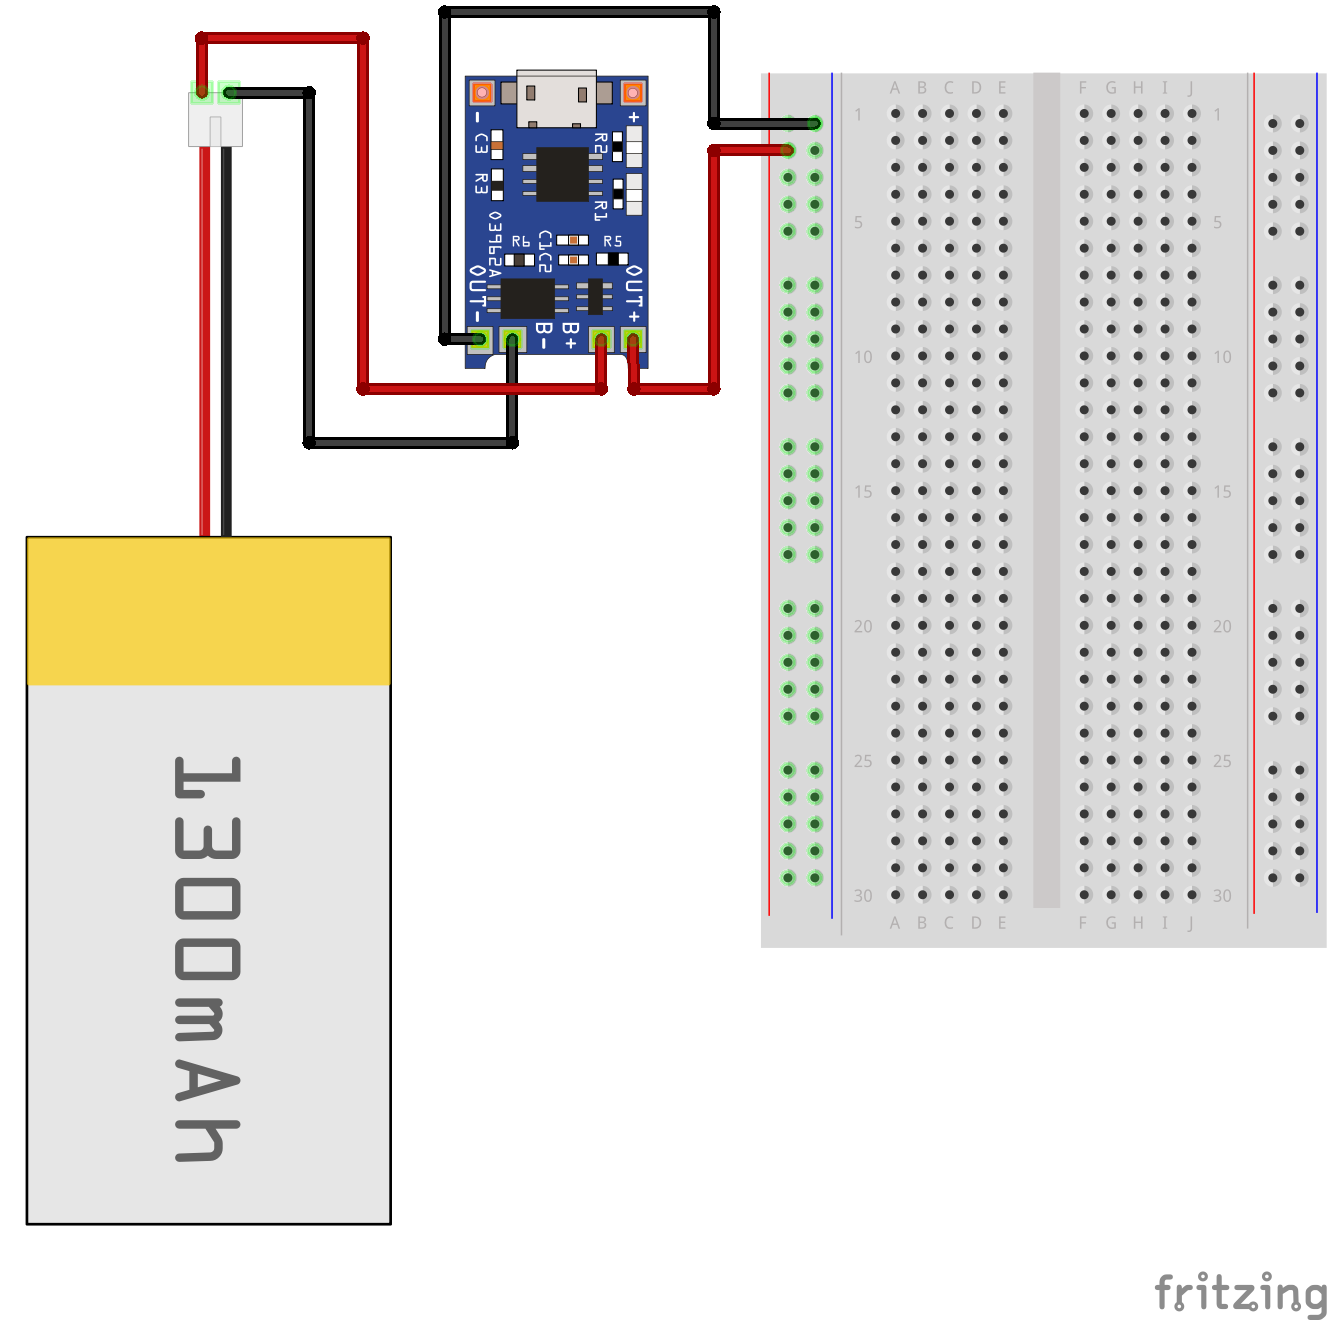
The deeper look (i.e. the Youtube introduction mentioned above) instead led me to the TP4056 Lithium Battery Charging Module. Older version of this module only function as a charge regulator. Newer versions can also be used for supplying power, for instance to an Arduino board.
You can get a TP4056 module for about 1 USD, even in Sweden if you buy a dozen or so (from fyndiq.se. They are even cheaper if you buy from for example BangGood.
3.7 to 5v stepup
Even if more and more small electronic modules and components tend to rely on 3.7 v, there are still a lot that require 5 v. If you go for a 3.7 LiPo battery you then need a 3.7 v to 5 v stepup module. Here are two alternatives with different output connections:
Other solutions
Alternatively one can use separate break out boards for charge control and fuel gauging, available from e.g. Sparkfun battery related stuff, or Adafruit lipo search.
Adafruit Micro-Lipo Charger
I got the Adafruit Micro-Lipo Charger for LiPo/LiIon Batt w/MicroUSB Jack - v1 as a first trial. Because it seemed to be able to do what I want and was available from elfa.se. But it turned out it can only be used for charging the battery. Neither draining the battery nor powering any components.
Battery
I just got a small standard PIS-1218 - PiJuice Zero LiPo-batteri 500 mAh from elfa.se. It was quite expensive and I need to find a cheaper solution.
On/off button
I need an on/off button to be able to turn the device on/off physically. My first solution was a bulky “nostalgia” version from pchbutik. But in 2020 I found another alternative, also at PchButik.
Wiring