
NOTE, 1 October 2020 the label ‘master’ was replaced by ‘main’ for the default repo branch.
Introduction
If you are going to use the git command line tool it is probably worth setting up a secure shell (or SSH) connection. How to do that for git, primarily using Mac OSX is the topic of this post. It is a summary of GitHub’s manual for Connecting to GitHub with SSH.
Prerequisites
git must be installed, if you need assistance look at the post on Install git for command line. This tutorial relies heavily on the Terminal command tool, if you are not acquainted with the command line, the Command line crash course (pdf) will teach you most things you need to know.
You also need to have an account at GitHub.com. Opening an account is free and as long as you agree to make all the code, text and other documents that you publish publicly available, also that is for free. Only if you require very large files or want to keep your documents private you need to pay.
Check for existing SSH keys
First check for any existing SSH keys. As SSH keys are OS dependent, follow the instructions for your OS at Checking for existing SSH keys. For Mac OSX, start the Terminal to list (ls) hidden .ssh files in your home directory:
$ ls -al ~/.ssh
If the returned message shows that you already have (unknown) .ssh files, please use the GitHub help page on Checking for existing SSH keys.
If you only use your SSH keys for GitHub, then you can replace your key without worrying about it. How to delete an existing key is covered further down.
Generating a new SSH key and adding it to the ssh-agent
If you do not have an existing SSH key and wish to generate one, follow the GitHub instructions Generating a new SSH key and adding it to the ssh-agent. The Mac OSX instructions are summarised here.
https://docs.github.com/en/free-pro-team@latest/github/authenticating-to-github/generating-a-new-ssh-key-and-adding-it-to-the-ssh-agent
In your Terminal window type:
$ ssh-keygen -t rsa -b 4096 -C "your_email@example.com"
Generating public/private rsa key pair.
Enter file in which to save the key (/Users/"youruser"/.ssh/id_rsa):
Just hit [return] to accept the default filename (id_rsa). Then you have to give a passphrase (password), twice.
Created directory '/Users/"youruser"/.ssh'.
Enter passphrase (empty for no passphrase):
Enter same passphrase again:
The SSH keys will be created.
Your identification has been saved in /Users/"youruser"/.ssh/id_rsa.
Your public key has been saved in /Users/"youruser"/.ssh/id_rsa.pub.
The key fingerprint is:
SHA256:+AseCretCodeWithDiffereNtAScIICodedSign&nrs your_email@example.com
The key's randomart image is:
+---[RSA 4096]----+
|            o.o  |
|            .= E.|
|             .B.o|
|              .= |
|        S     = .|
|       . o .  .= |
|        . . . oo.|
|             . o+|
|              .o.|
+----[SHA256]-----+
Start the ssh-agent in the background:
$ eval "$(ssh-agent -s)"
The command returns the pid (system tracker for the process).
Agent pid 58867
To create the SSH configuration file you need a text editor. From the terminal you can for instance use pico:
$ pico ~/.ssh/config
Enter (or copy and paste) the following code (it assumes that you saved your key in the default file name id_rsa):
Host *
  AddKeysToAgent yes
  UseKeychain yes
  IdentityFile ~/.ssh/id_rsa
Hit [ctrl]+[X] to exit pico and save the edits by pressing Y when asked.
Add the SSH key to the system management, you have to give the passphrase you just created:
$ ssh-add -K ~/.ssh/id_rsa
Enter passphrase for /Users/"youruser"/.ssh/id_rsa:
Identity added: /Users/"youruser"/.ssh/id_rsa (your_email@example.com)
Confirm that your SSH key was added:
$ ssh-add -l
To delete a key:
$ ssh-add -d [key]
To add a key:
$ ssh-add [key]
In the next section you need the public copy of your key (residing in the file id_rsa.pub). You are going to tell GitHub.com that this key should open your account for different requests. To copy the key to the clipboard, use the command:
$ pbcopy < ~/.ssh/id_rsa.pub
GitHub SSH setup
This section describes how to configure your GitHub account to use the SSH key, it is a shortened version of the GitHub page Adding a new SSH key to your GitHub account.
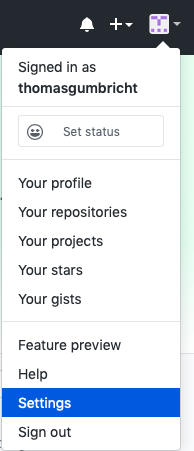
Go to your GitHub account at GitHub.com. Click on your avatar (shown to the left), in the drop down menu, select .
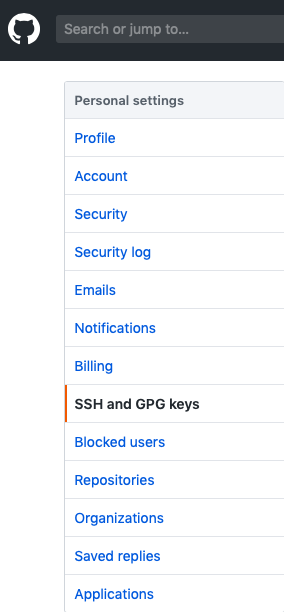
In the user settings window that opens, look at the sidebar for (as shown to the right), and click it.
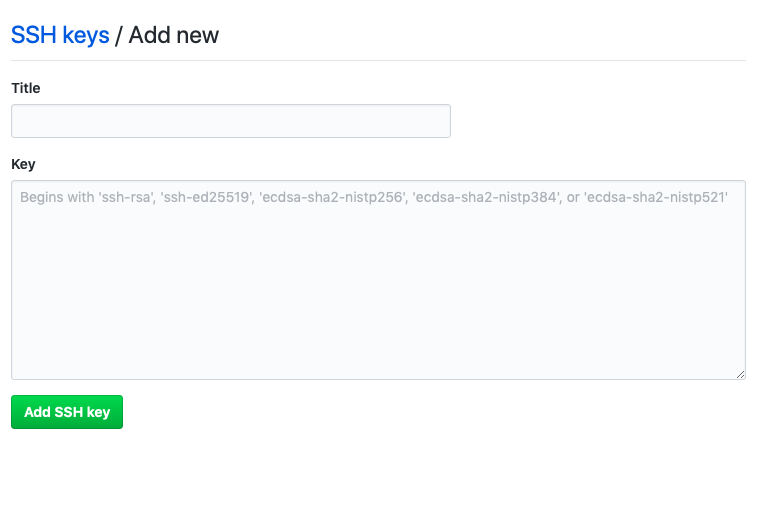
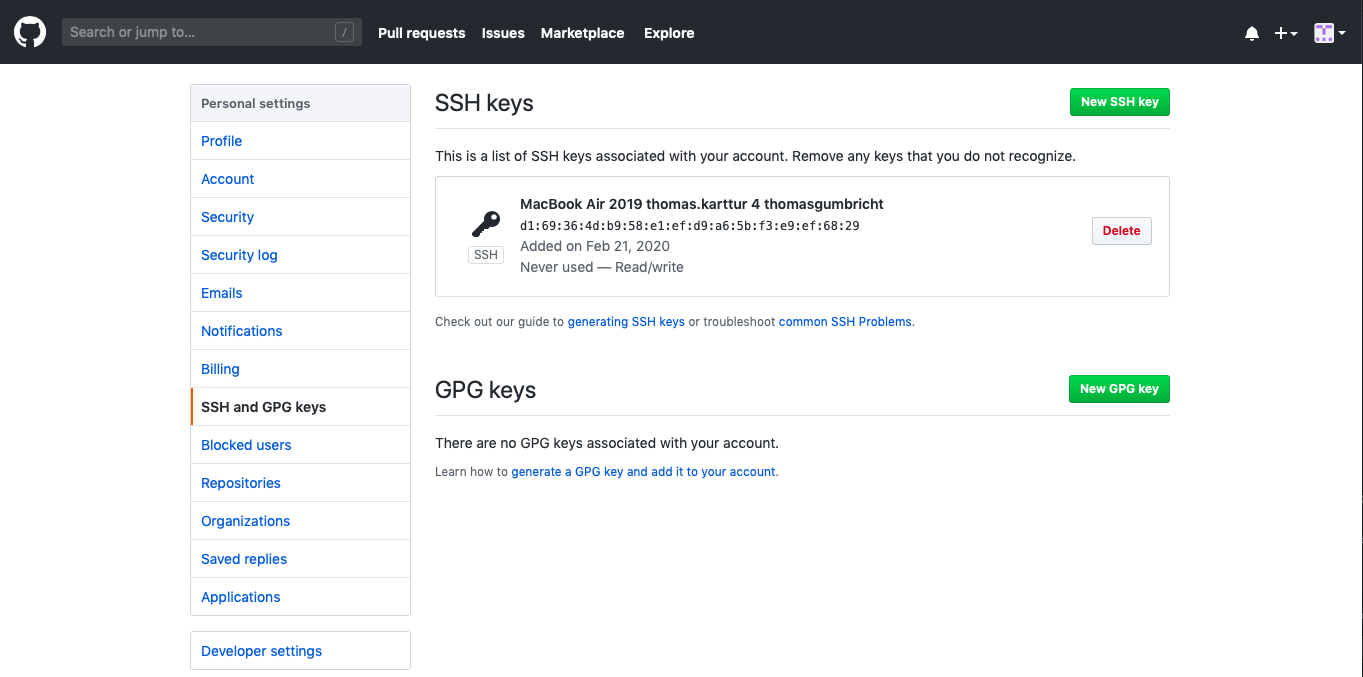
In the page for SSH-keys and GPG-keys that opens, click the button (below).

A new page, “SSH keys / Add new”, opens (below), In the Title field, add a descriptive label for the new key. The title should reflect both the machine (owner) and the lock (the GitHub repo). Then paste the content of the clipboard, captured with the pbcopy command, in the Key field. When done, click .
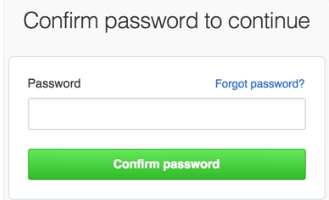
If prompted to confirm with your GitHub password, do that.
You should now have the same SSH key defined in your machine and on GitHub. And be ready for seamlessly linking your remote and local git repos.
Adding additional SSH keys
To add a second SSH key, with a few modifications outlined below you can follow the instructions above, but give a new file name where to save the key. The post Multiple SSH Keys settings for different github account is useful for understanding different options.
Open a terminal window, and generate a SSH key for an email account that you have not yet generated a key for:
$ ssh-keygen -t rsa -b 4096 -C "your_other_email@example.com"
Do NOT accept the default with the returned message:
Generating public/private rsa key pair.
Enter file in which to save the key (/Users/"youruser"/.ssh/id_rsa):
as this is probably the name of your already existing key. Instead enter the full path to a new file in the path /Users/”youruser”/.ssh/, indicating the GitHub account for which this SSH key is intended. Let us say that your second GitHub account is “my_2nd_github_account”, then answer like this:
Generating public/private rsa key pair.
Enter file in which to save the key (/Users/"youruser"/.ssh/id_rsa): /Users/"youruser"/.ssh/id_rsa_my_2nd_github_account
Once the file is saved, you will be prompted for a passphrase, twice:
Enter passphrase (empty for no passphrase):
Enter same passphrase again:
The SSH key will then be saved in two files, reported at the command line:
Your identification has been saved in /Users/"youruser"/.ssh/id_rsa_my_2nd_github_account.
Your public key has been saved in /Users/"youruser"/.ssh/id_rsa_my_2nd_github_account.pub.
Followed by details on your SSH key:
The key fingerprint is:
SHA256:+AseCretCodeWithDiffereNtAScIICodedSign&nrs your_other_email@example.com

The key's randomart image is:
+---[RSA 4096]----+
|            o.o  |
|            .= E.|
|             .B.o|
|              .= |
|        S     = .|
|       . o .  .= |
|        . . . oo.|
|             . o+|
|              .o.|
+----[SHA256]-----+
Start the ssh-agent in the background:
$ eval "$(ssh-agent -s)"
The command returns the pid (system tracker for the process)
Agent pid 16172
You now have to open the file ~/.ssh/config and edit it so that it points towards your new SSH key:
pico ~/.ssh/config:
Host github.com-my_2nd_github_account
  AddKeysToAgent yes
  UseKeychain yes
  IdentityFile ~/.ssh/id_rsa_my_2nd_github_account
Add your new SSH private key to the ssh-agent and store your passphrase in the keychain:
$ ssh-add -K ~/.ssh/id_rsa_my_2nd_github_account
Identity added: /Users/"youruser"/.ssh/id_rsa_my_2nd_github_account (your_other_email@example.com)
With your second SSH key setup on your machine, the registering of the SSH key in your GitHub account (“my_2nd_github_account”), is exactly like before.
Resources
Authenticating to GitHub at GitHub.com.